


Irresistible Crunchie Honeycomb Cheesecake. A no-bake dessert made with a buttery Lotus Biscoff base and smooth, creamy chocolate and Crunchie bar filling.
The Crunchie bar AKA honeycomb is the star of the show here. The chunky bar enveloped in milk chocolate is chopped into gleaming shards of gold and it's glorious!

There's a strong honeycomb/cinder toffee flavour throughout this entire cheesecake. It's a really REALLY excellent cheesecake and so quick and easy to make.
I went with a Lotus Biscoff base for the cheesecake as felt something like digestive biscuits were a bit plain. However, you're welcome to use any biscuit you fancy for the base. Hobnobs or gingernuts would work well.
As for the filling, this recipe is based on my perfect no-bake Vanilla Cheesecake. Although I did reduce the cream cheese content to make up for the fact that I've added melted milk chocolate.
I folded pieces of Crunchie bar into the filling itself. For anyone wondering, the Crunchie doesn't actually go that soft but it does weep a bit.
So for this particular cheesecake, I'm recommending that you make it with the intent of eating it within a day or two. For transparency, this stuck around in my fridge for 4 days and still tasted incredible on the 4th day but it wasn't as pretty as on day 1.

Top tips
- I use an 8" springform tin which makes it easier to release the cheesecake once it's set.
- Make sure you use room temperature full-fat cream cheese. The brand by Philadelphia has never failed me.
- Leave the chocolate to cool for 5 minutes before adding it to the cream cheese. This will prevent it from going grainy.
- Whip the double cream to stiff peaks in a separate bowl then gently fold it into the cheesecake filling mixture.
- Cut the Crunchie bars with a knife as opposed to crushing them with a rolling pin. This will give you decent sized nuggets of honeycomb rather than 'dust'!
- Plan to make the cheesecake the day before you intend to serve it. Leave it to set in the fridge overnight.
- When you've released the cheesecake from the springform tin if you can't easily pry it from the bottom of the tin just leave it or you risk breaking the base.
- Use a large sharp knife to cut the cheesecake. Once you've cut the first slice you'll be able to easily remove the bottom of the tin.

Step by step
The images below will show you what the mixture should look like at each stage of the recipe. There is also a recipe video above to help you.
Beat the cream cheese with the icing sugar until it's smooth and creamy.

Add the cooled, melted chocolate and beat again until uniform in colour.

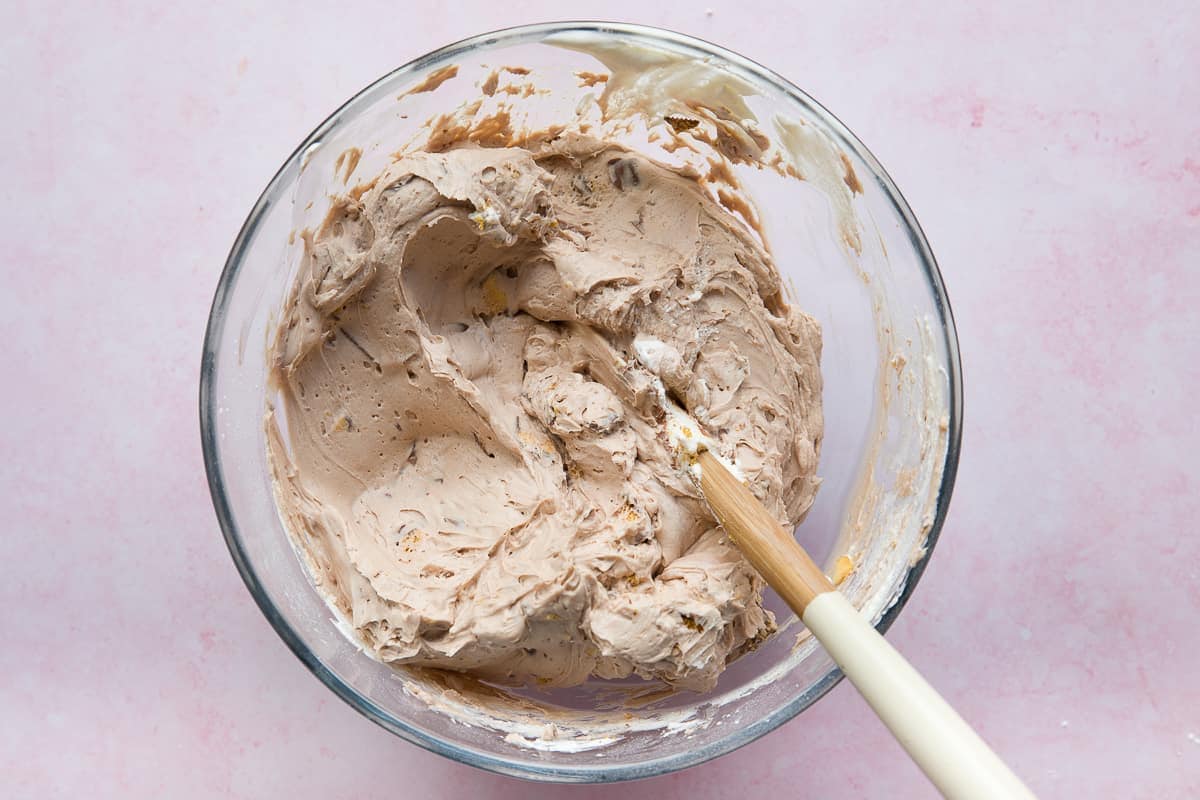
Whip the double cream to stiff peaks in a separate bowl then add it to the chocolate cheesecake mixture along with the chopped Crunchie bars.
Fold the cream and Crunchie pieces, by hand, very gently into the mixture.
Transfer the Crunchie cheesecake filling on top of the biscuit base in the 8" springform tin.

The following day, release the Crunchie Cheesecake from the tin and decorate the top with chopped Crunchie bars.

I hope you love this Crunchie Honeycomb Cheesecake as much as I did. It was so much fun coming up with another delicious no-bake recipe.
Please leave me a rating and a comment/review below if you enjoyed it. I read and appreciate every single one!

Scroll to the bottom of the page for the full list of ingredients and recipe method :)
More No-Bake Cheesecake Recipes
A collection of Amy's favourite no-bake cheesecake recipes. All of them are fun and easy to recreate at home!

Oreo Cheesecake Guaranteed To WOW Your Guests!
Incredible No-Bake Oreo Cheesecake with an Oreo crust and silky smooth Philadelphia, double cream and crushed Oreo filling. Topped with sweetened whipped cream swirls, double stuffed Oreos and a drizzle of hot chocolate sauce. This is the ultimate indulgent dessert guaranteed to WOW your guests.

Malteser Cheesecake
Delicious Malteser Cheesecake with a Hobnob chocolate biscuit base, cream cheese, malt and Malteser filling and topped with swirls of sweetened double cream and a pile of Maltesers.

Easter Egg Cheesecake
Easter egg meets cheesecake in this outrageously decadent dessert. Chocolate Easter eggs with a crumbly Lotus biscoff biscuit mixture and stuffed to the brim with no-bake cheesecake filling. Topped off with Easter treats this is an Easter EGGSTRAVAGANZA!

Easy Lemon Cheesecake (No Bake!)
A Lemon Cheesecake so creamy and zesty making every single mouthful heavenly. Paired with a gingernut biscuit base, topped with sweetened cream swirls and simple lemon slices it's the cheesecake of your dreams!

Vanilla No-Bake Cheesecake
Velvety-smooth, silky, creamy and light with a crisp buttery crust. Decorated with swirls of softly whipped cream and plump sweet strawberries.

White Chocolate Cheesecake with Stuffed Strawberry Santas
A very festive and Christmassy White Chocolate Cheesecake decorated with strawberries stuffed with sweetened whipped cream and made to look like Santa. You couldn't get cuter than this!

Stunning Eton Mess Cheesecake (No-Bake)
A stunning Eton Mess Cheesecake with a delicious buttery biscuit base, fresh strawberries, white chocolate and cream filling topped with berries, mini meringues and chocolate flakes.

Exquisite Red Velvet Cheesecake (no bake)
An exquisite Red Velvet Cheesecake made from an Oreo crust, filled with velvety smooth dark chocolate and cream cheese and topped with lashings of softly whipped double cream.


No-bake Ferrero Rocher Cheesecake
Learn the secrets to making a no-bake Ferrero Rocher cheesecake with a chocolate chip cookie base, Ferrero Rocher layer and silky smooth Nutella and cream cheese filling. Topped with chopped hazelnuts and Ferrero Rocher chocolates - this is a decadent dessert perfect for Christmas!

No-bake Reindeer Christmas Cheesecake
A beautiful no-bake vanilla cheesecake with festive reindeer decoration that will bring Christmas cheer to all!

Incredible No-Bake Lotus Biscoff Cheesecake
This incredible cheesecake has a Lotus Biscoff biscuit base, no-bake creamy and smooth vanilla filling laced with dollops of Biscoff spread throughout. It's drizzled with a warm Biscoff spread that drips tantalizingly down the sides and is topped off with whipped cream swirls and yep, you guessed it, even more, Lotus biscuits - of the cream variety!

No-Bake Crunchie Cheesecake
Irresistible Crunchie Honeycomb Cheesecake. A no-bake dessert made with a buttery Lotus Biscoff biscuit base and smooth, creamy chocolate and Crunchie bar filling.
Ingredients
For the base
- 250g (1 packet) Lotus Biscoff biscuits, crushed
- 100g (0.25 cup + 3tbsp) unsalted butter, melted
For the cheesecake filling
- 520g (2.25 cups) full-fat cream cheese
- 125g (0.75 cup + 2tbsp) icing sugar
- 180g (1 cup) milk chocolate, melted
- 300ml (1.25 cups) double cream
- 200g (approx 6 bars) Crunchie bars, chopped
For topping
- 200g (approx 6 bars) Crunchie bars, chopped
Instructions
- Blitz the Biscoff biscuits in a food processor or place them in a ziploack bag and bash them up with a rolling pin. Melt the butter and add it to the biscuit crumbs. Mix until well combined then tip the biscuit crumbs into an 8" springform tin. Press the base down with the back of a spoon to make it smooth and level.
- To make the filling put the cream cheese and icing sugar into a large bowl and beat until smooth and creamy.
- Break the chocolate into pieces then put it into a heatproof bowl set over a pan of simmering water. (Don't allow the bottom of the bowl to touch the water.) When the chocolate has melted, leave it to cool for 5 minutes.
- Pour the melted chocolate into the cream cheese mixture and beat until well combined.
- In a separate bowl beat the double cream to very stiff peaks. Add the whipped cream to the cream cheese and chocolate mixture along with the chopped Crunchie bars (200g). Fold everything together gently, by hand, until fully combined and uniform in colour.
- Transfer the cheesecake filling on top of the biscuit base. Use a spatula or the back of a spoon to make it level.
- Wrap in clingfilm then put the cheesecake into the fridge to set overnight.
- The following day, remove the Crunchie Cheesecake from the springform tin. Decorate the top with the remaining chopped Crunchie bars (200g). Cut into 8-10 pieces using a sharp knife.
Notes
- Make sure you use full-fat cream cheese otherwise your cheesecake won't set.
- Please whip the cream separately to very stiff peaks and do not pour it into the cheesecake mixture in its liquid form. This is the number one reason cheesecakes don't set. The whipped cream is what stabilises the cheesecake!
- Storage: Crunchie Cheesecake should be stored in the fridge is best eaten within 1-2 days because the Crunchie bars inside the filling will weep. It is still very tasty and edible after that time but it won't look as nice as when it was first made.
Nutrition Information:
Yield: 10 Serving Size: 1Amount Per Serving: Calories: 623Total Fat: 48gSaturated Fat: 27gTrans Fat: 0gUnsaturated Fat: 17gCholesterol: 120mgSodium: 267mgCarbohydrates: 43gFiber: 1gSugar: 30gProtein: 7g
Nutrition is an estimate only.


Leave a Reply