


I'll show you step-by-step exactly how to make a perfect no-bake cheesecake that actually sets!
This effortless recipe uses a very simple method and easy ingredients to create a velvety-smooth, light and creamy vanilla cheesecake that you'll make again and again.

Jump to:
It's no wonder that here in the UK no-bake cheesecakes are one of the most popular desserts for home bakers to make.
Cheesecakes require little effort and the results are pleasing to almost everyone that tries it. If you don't like cheesecake, can we even be friends?!
In order to explain step by step how to make this lovely pud I've made the simplest, and perhaps most underrated of all cheesecakes: Vanilla No-Bake Cheesecake.
While I love over-the-top cheesecakes stuffed and topped with chocolate bars; there's something very special about an unadulterated cheesecake. Naked in flavour, except for a touch of vanilla.
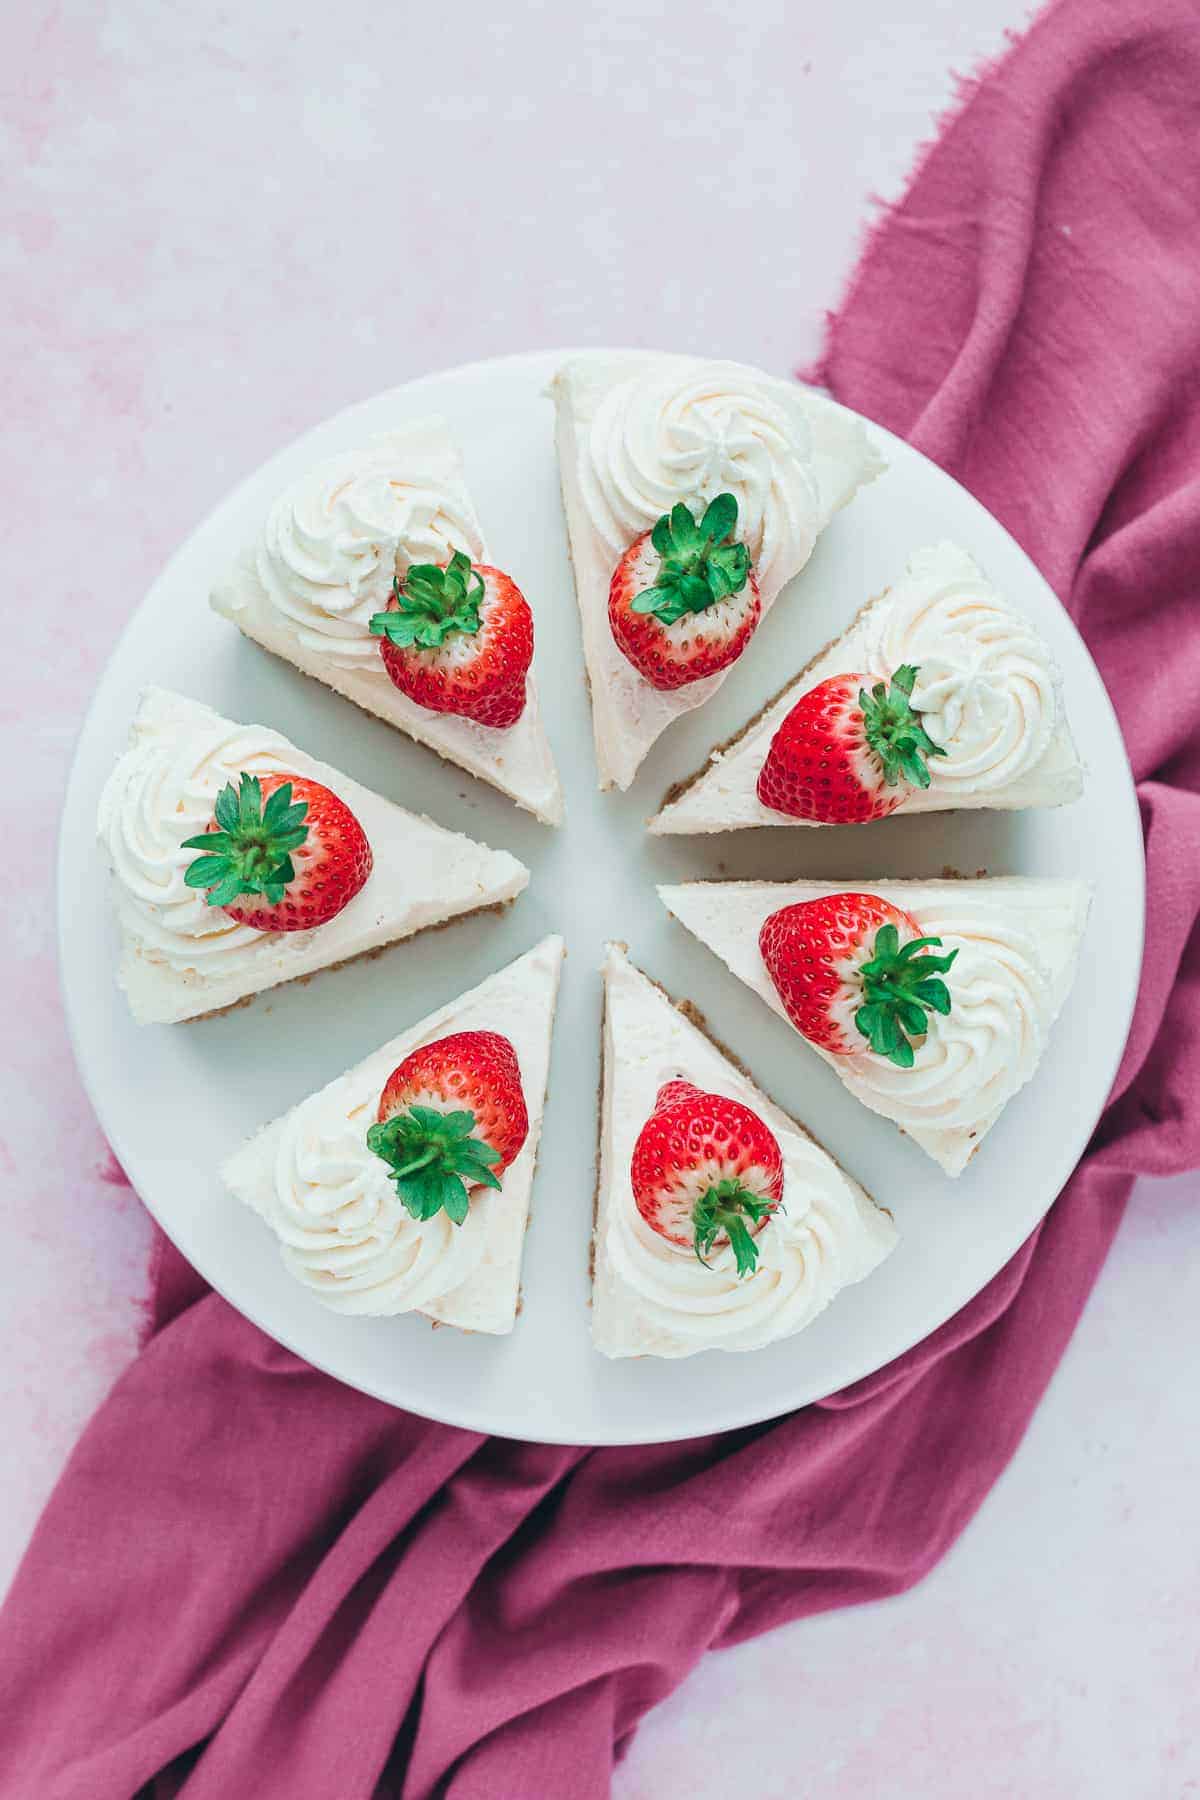
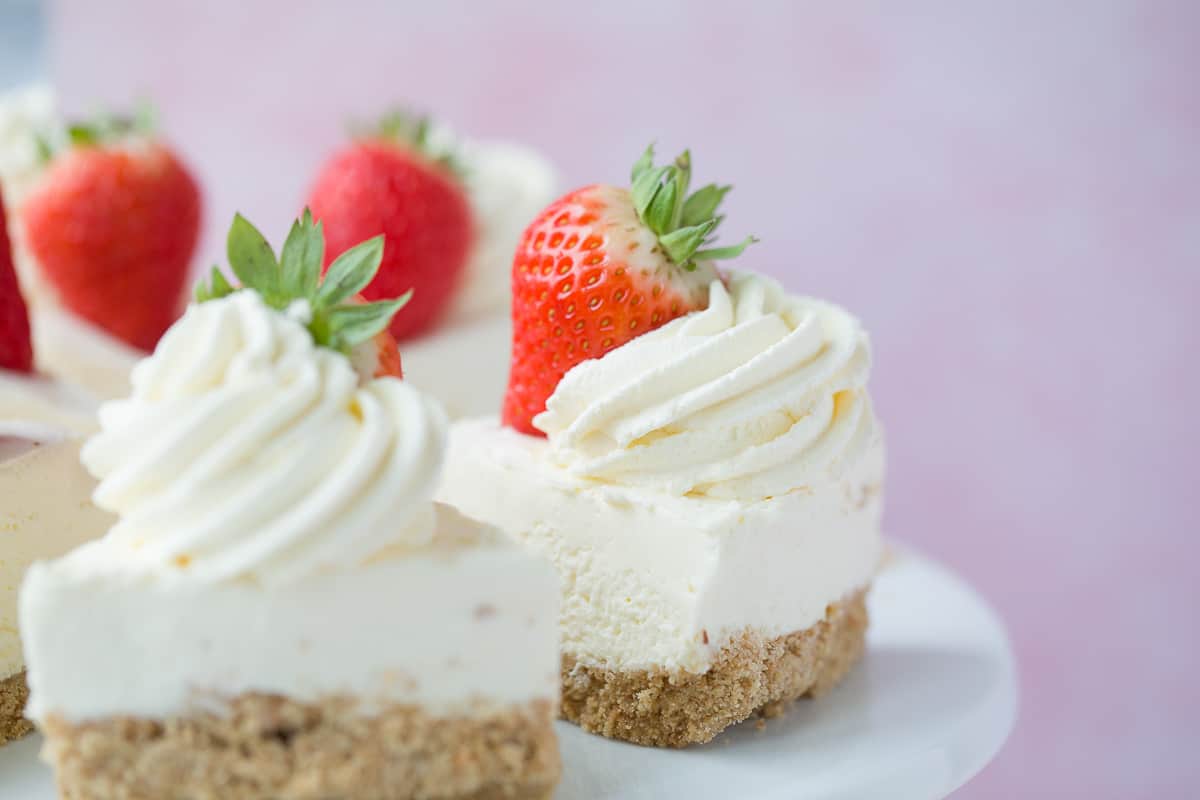
It's smooth, silky, creamy and light with a crisp buttery crust. Adorned only with swirls of softly whipped cream and plump sweet strawberries.
Let's start at the beginning and run through all the elements needed to make a perfect no-bake cheesecake with a velvet-like texture.
Your friends will all be asking you for the recipe!
I'll run through some variations further down, but, for the most part, cheesecakes begin the same way.
- Crushed biscuits
- Melted butter
- Cream cheese
- Icing sugar
- Double cream
Biscuit base
There are millions of recipes for no-bake cheesecake on the internet, in cookery books and magazines. Many of them will call for a digestive biscuit base - Graham Crackers in the US.
And while they do make a superb base (and I've used them in this vanilla cheesecake recipe). You can be free to experiment with your cheesecake crust as much as you switch up the fillings.
You can pretty much use any biscuit you fancy; crush them into crumbs and combine with butter to make the cheesecake base.
From chocolate chip cookies to Lotus Biscoff biscuits - and even pink wafers - the combinations are endless.
One rule of thumb I follow is to use 125g of melted unsalted butter to 250g of crushed biscuits. Although this is subject to change should you use a biscuit with a higher butter content or containing chocolate.
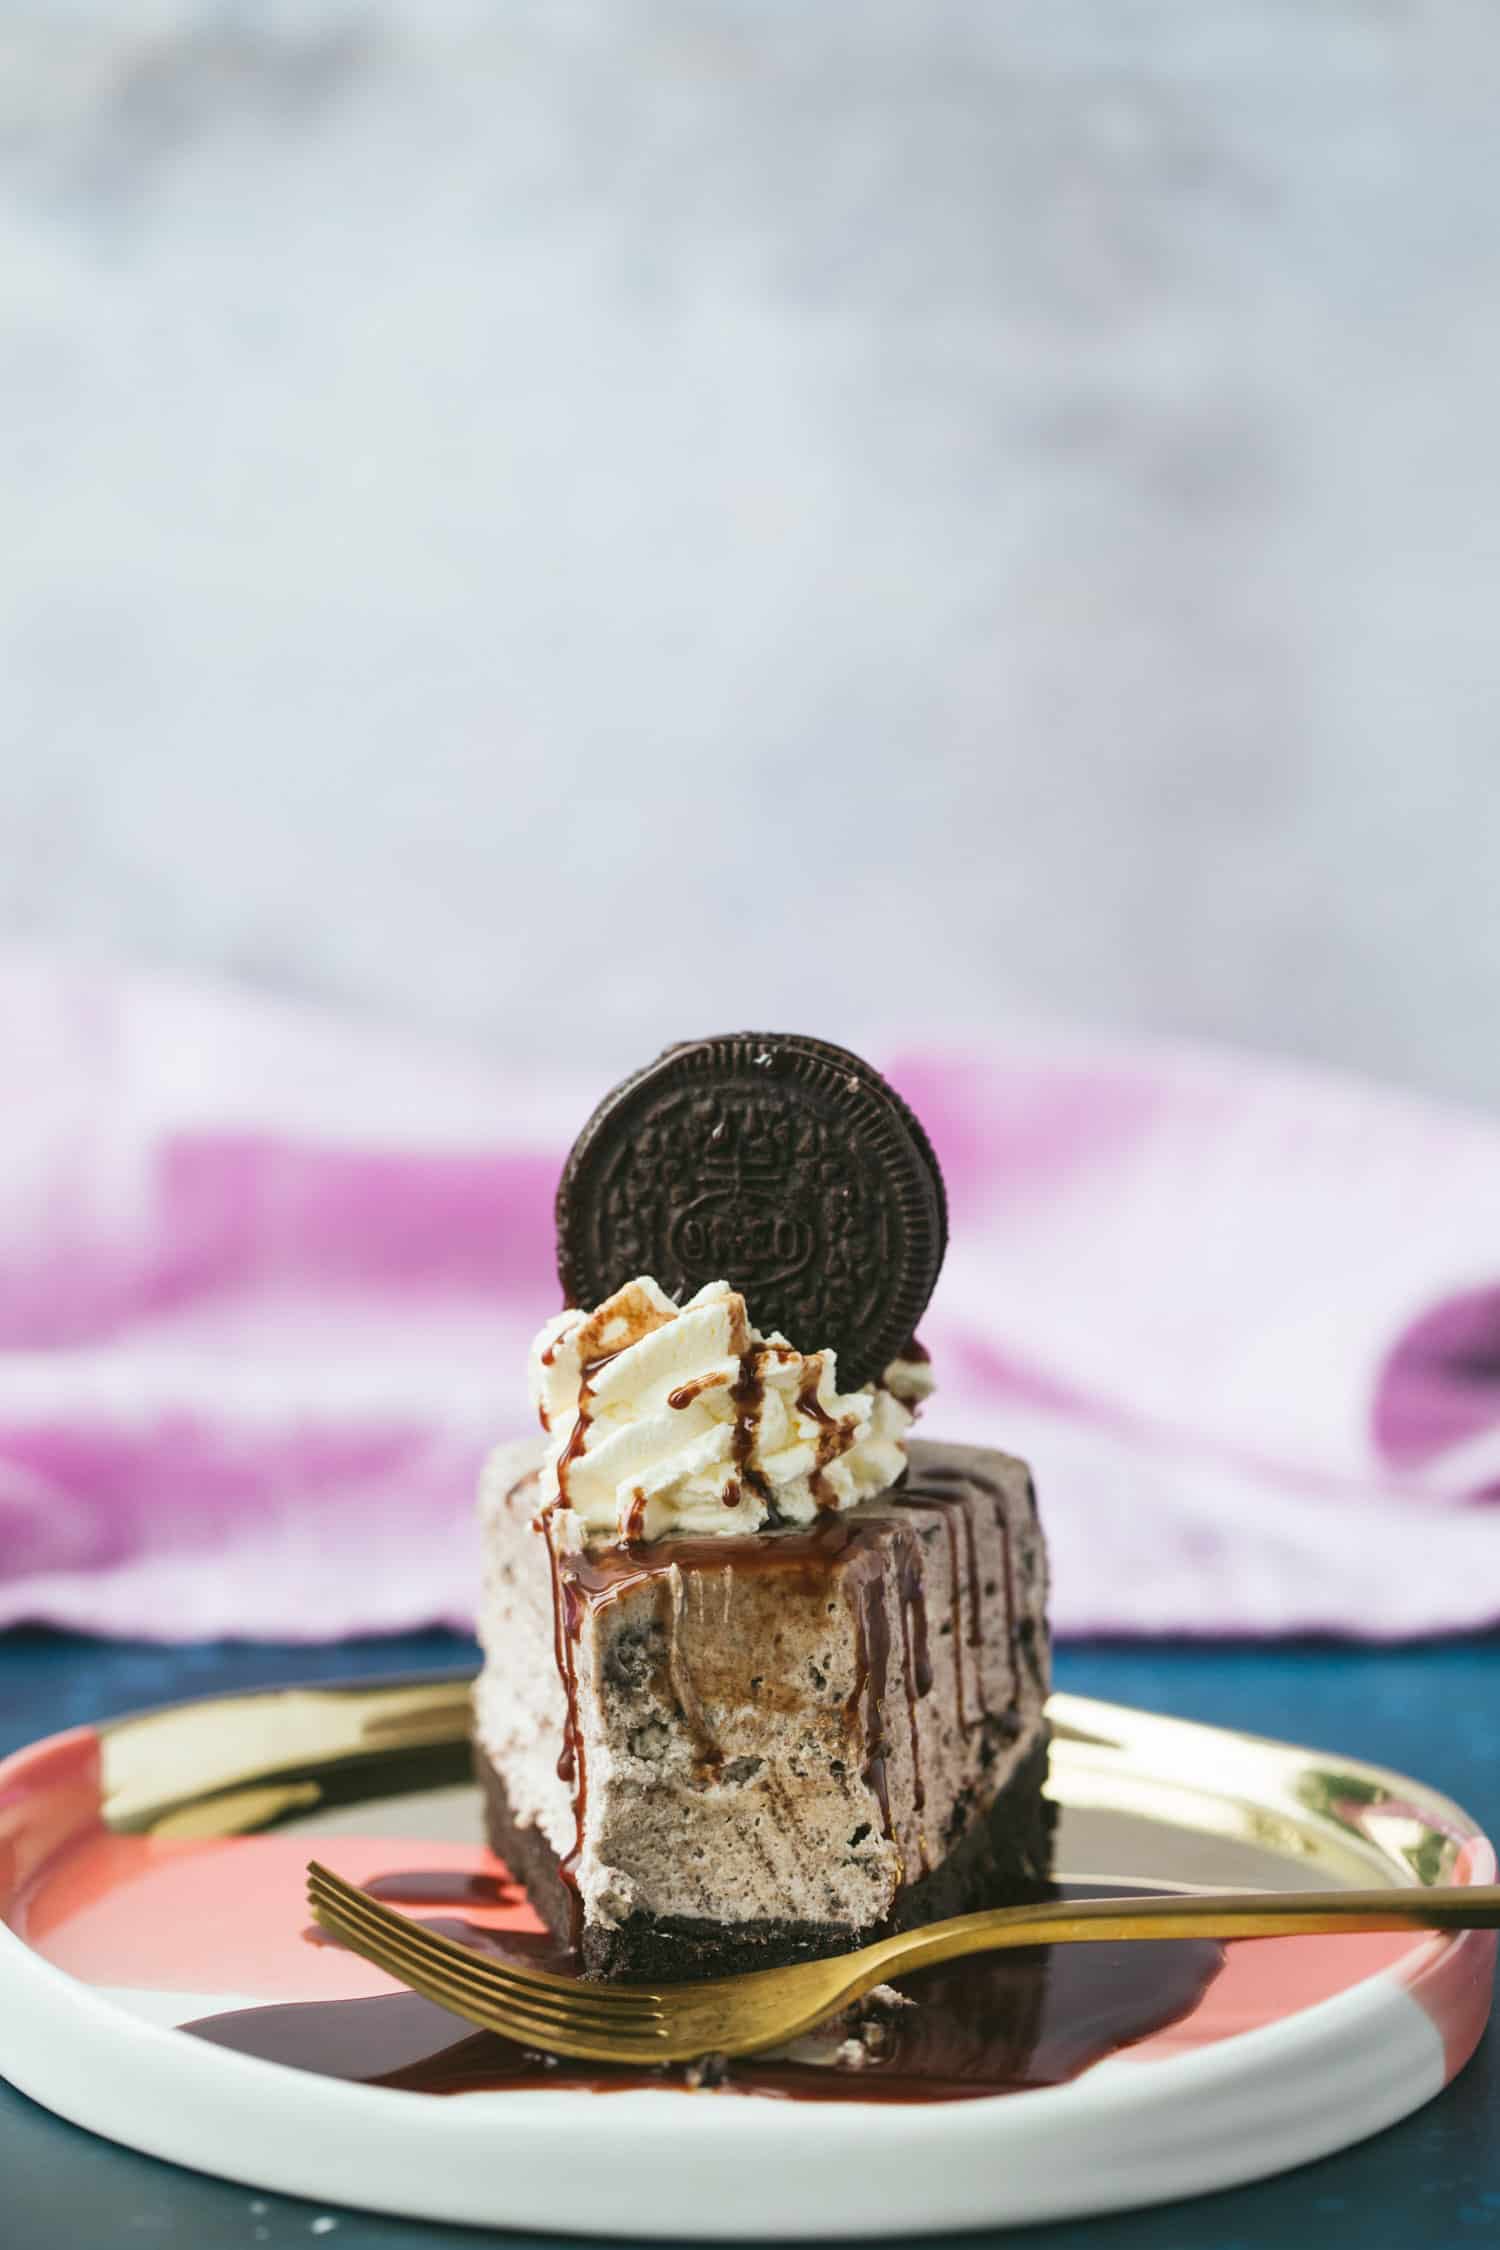
This Oreo Cheesecake uses the entire Oreo, cream filling and all. Chocolate Hobnobs are used in my Malteser Cheesecake so these richer varieties of biscuit and cookie generally require less butter in order to stick together and form a no-bake crust.
You can crush the biscuits to crumbs using a food processor or place them in a ziplock bag and give them a good bashing with a rolling pin.
Either method will result in a fine enough biscuit crumb to which you then add melted butter.
Once the butter has been added the mixture will turn from crumbs to more of a wet sand consistency and it is then that you can transfer the buttery biscuit mixture to your tin.
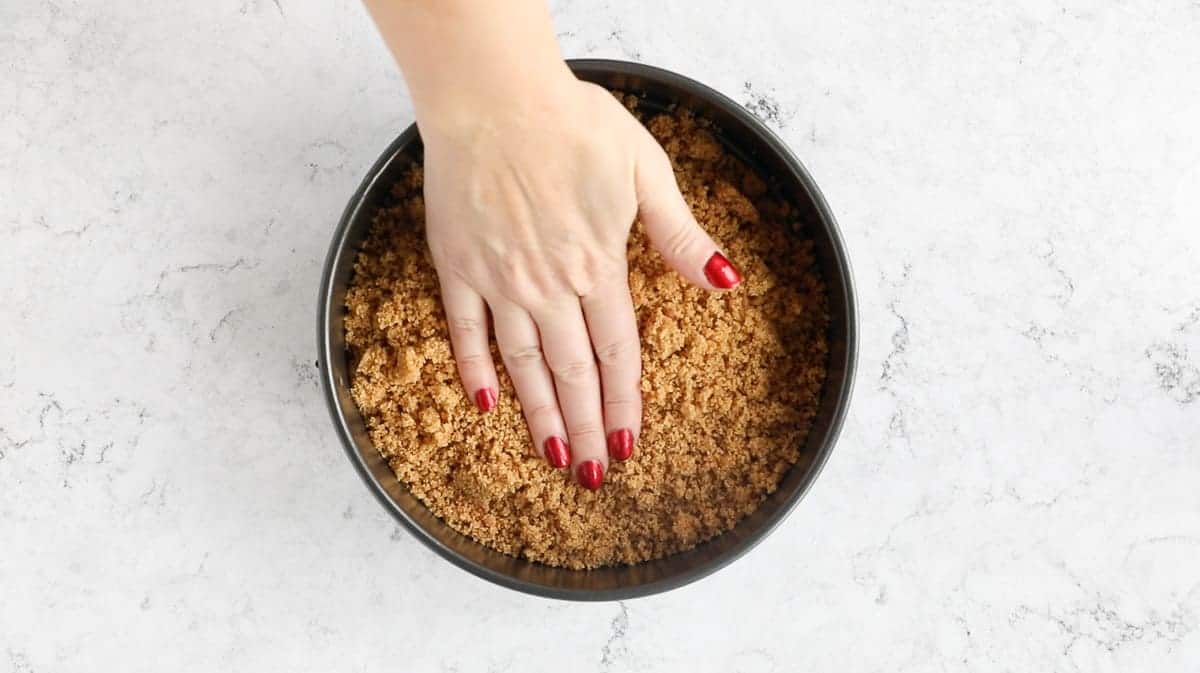
The majority of the time I will press in an even layer of biscuit to the base of my tin. Tip the crumbs in and use your hands, an upturned glass or a spoon to press the mixture into the base of the tin.

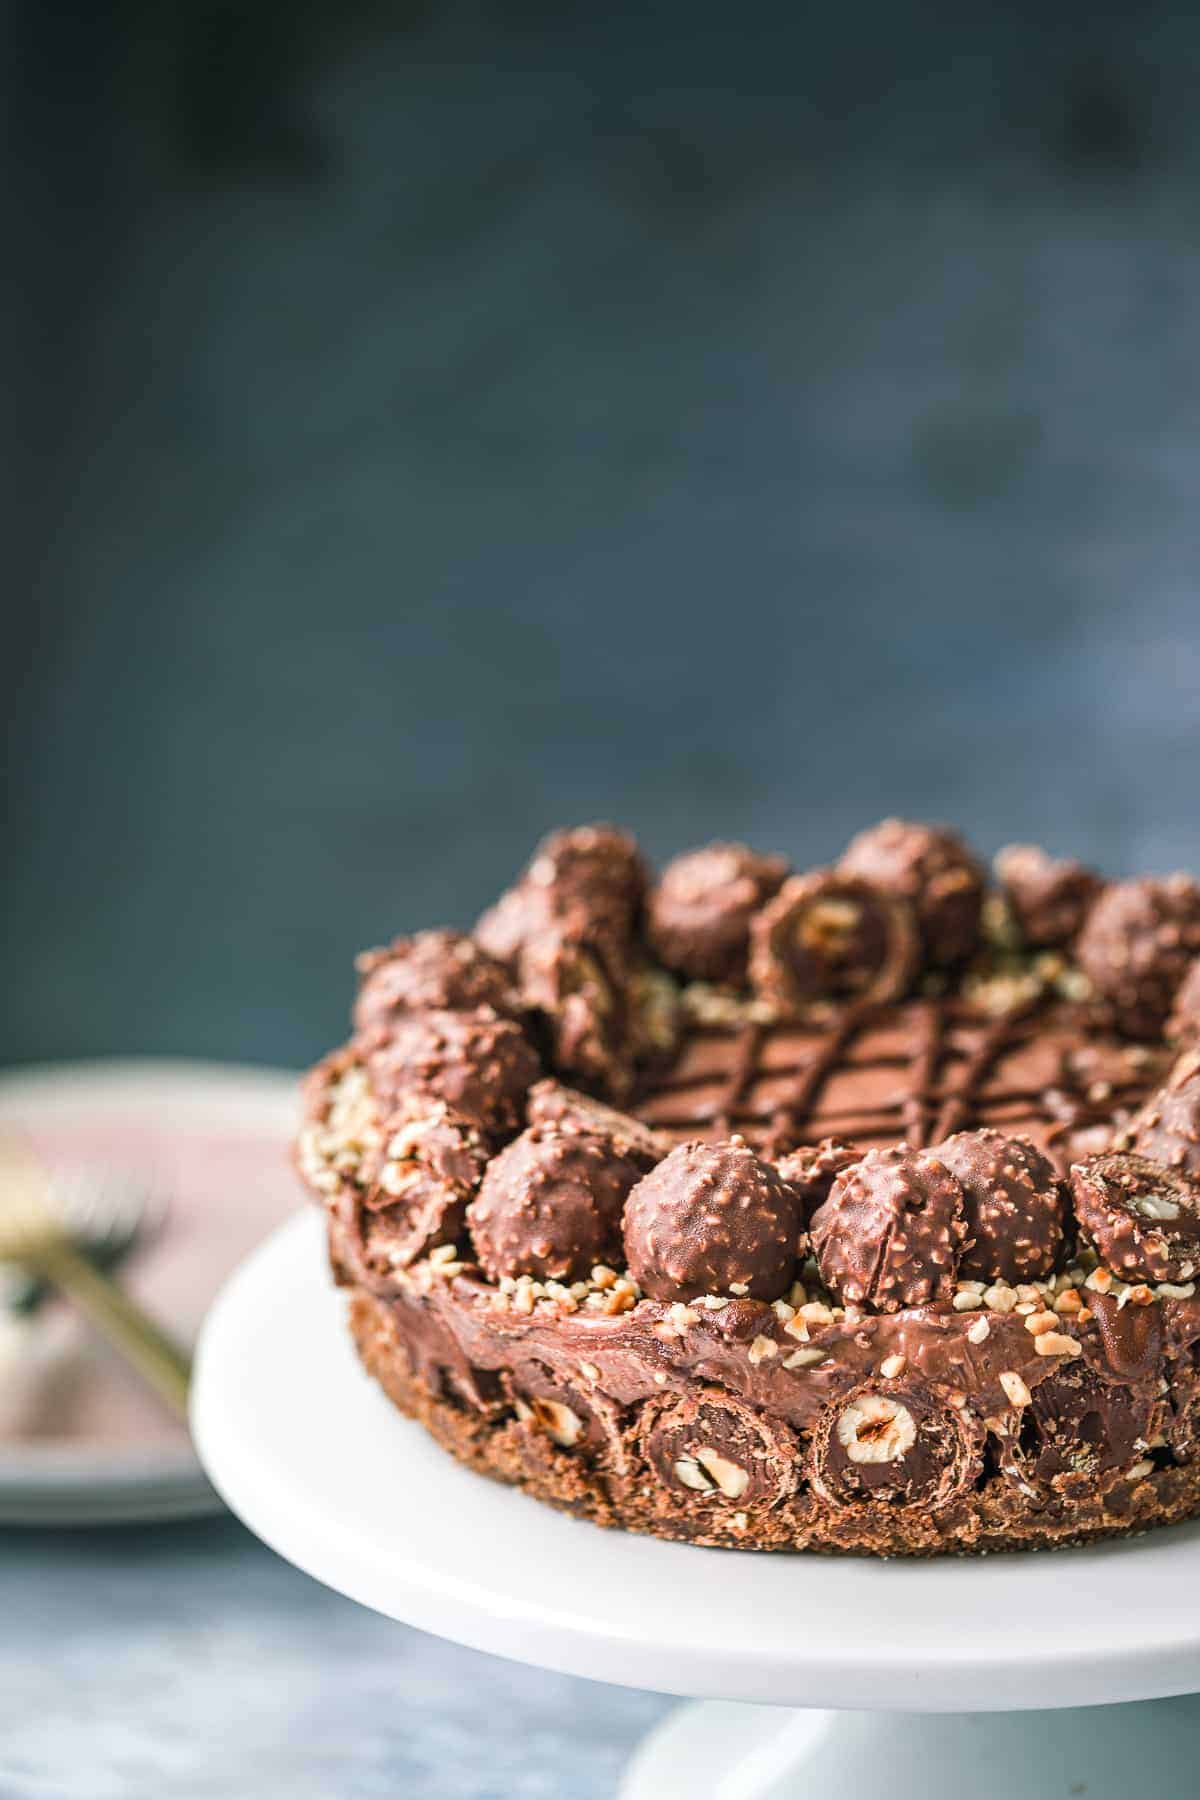
For an extra special treat, you can add chocolates, fruit or another layer like the Caramel in this Millionaire's Cheesecake to the base. What you add gets sandwiched in between the base and filling and looks really impressive. Have a look at my Ferrero Rocher Cheesecake for an example.
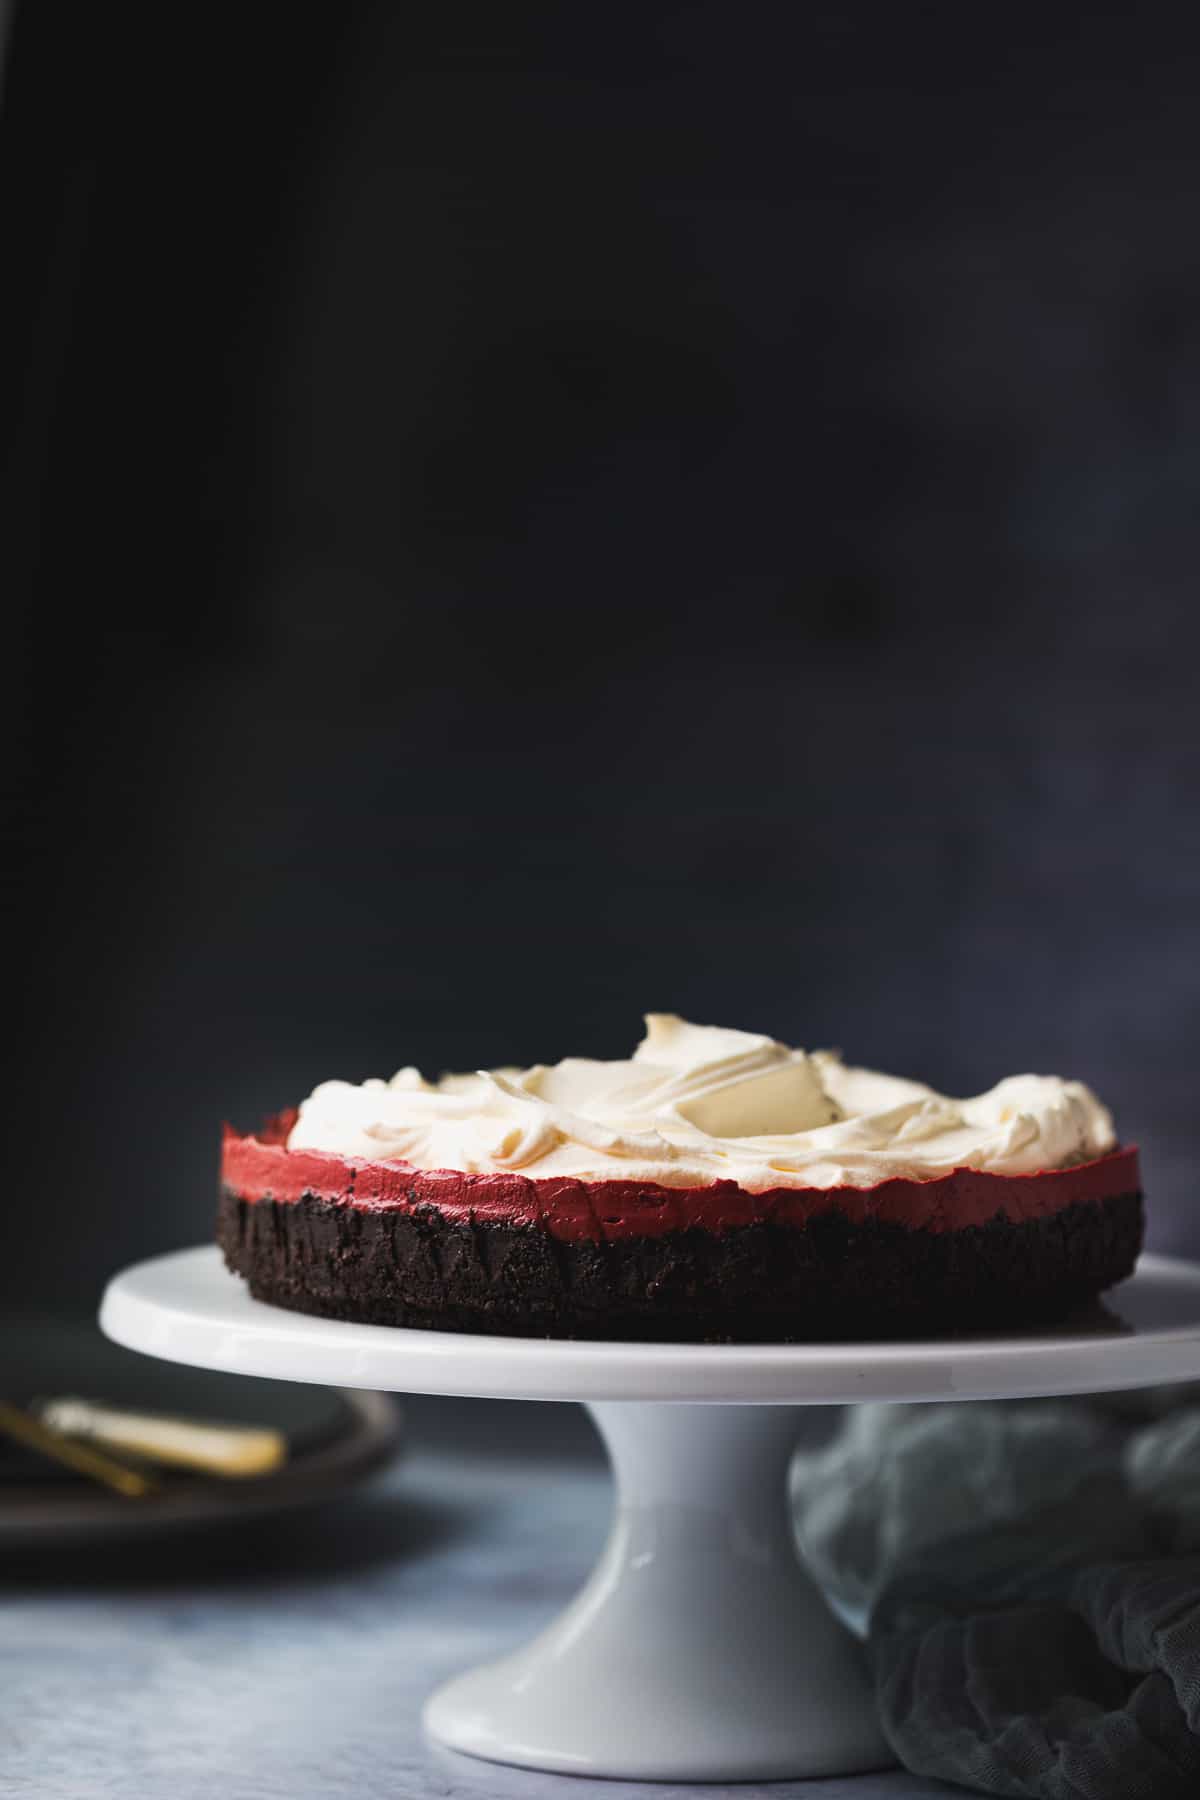
Occasionally I will bring the biscuit base up the side of the tin which creates more of a pie like appearance as opposed to a flat base. As seen in my Red Velvet Cheesecake.
Amy's top tip: Don't press too hard when you add the biscuit crust to the tin or it will set too hard and be difficult to remove and cut.
The best tin to use for a cheesecake
Speaking of pressing biscuit crumbs into tins let's take a moment to discover the very best tin for making a no-bake cheesecake.
I have had great cheesecake success using a very deep 20cm (8") loose-bottomed tin as well as a 20cm (8") springform tin.
I like using the loose-bottomed high sided tin for making deep filled cheesecakes with lots of filling. Just like my Mini Egg Cheesecake and Galaxy Caramel Cheesecake.
I've been favouring a springform tin for my recent cheesecake recipes because I find them easier to release the cheesecake neatly.
These are my favourite tins:
Amy's top tip: When adding the filling to the tin, push it up the sides of the tin before levelling out. This gets rid of any trapped air bubbles and helps the cheesecake to have smooth sides. When all the filling has been added and levelled you can tap the whole tin on the kitchen worktop for extra insurance against pesky air bubbles!
How to make no-bake cheesecake that actually sets!
I think a cheesecake filling that doesn't set has to be everyone's bugbear when making this no-bake dessert.
I know how frustrating it is to spend money on ingredients only to end up with a soupy mess!
Fear not because I've made hundreds of cheesecakes and I'll walk you through exactly how to make a beautifully set no-bake cheesecake.
A basic cheesecake filling is made up of cream cheese, icing sugar and double cream. To this, you can add melted chocolate, flavourings or pieces of your favourite chocolate bars.
- Cream cheese: Must be full fat and it's best to use it at room temperature. I know people have success with supermarket own brands but I always use full fat Philadephia because it has never failed me.
- Icing sugar: Also known as powdered sugar or confectioner's sugar. Icing sugar thickens and sweetens the cheesecake filling. You can use caster sugar but may find it leaves a slight graininess to the filling whereas icing sugar will dissolve completely.
- Double cream: you can not use single cream nor cream with a lower fat content in a no-bake cheesecake. Cold double cream whipped to stiff peaks is what makes the cheesecake set. In the UK our double cream is 48% fat. If you are in the US you need to use heavy cream. Elsewhere you will need to look for a cream with the highest fat content you can find. If this is unavailable to you then you may need to use a setting agent such as gelatine.
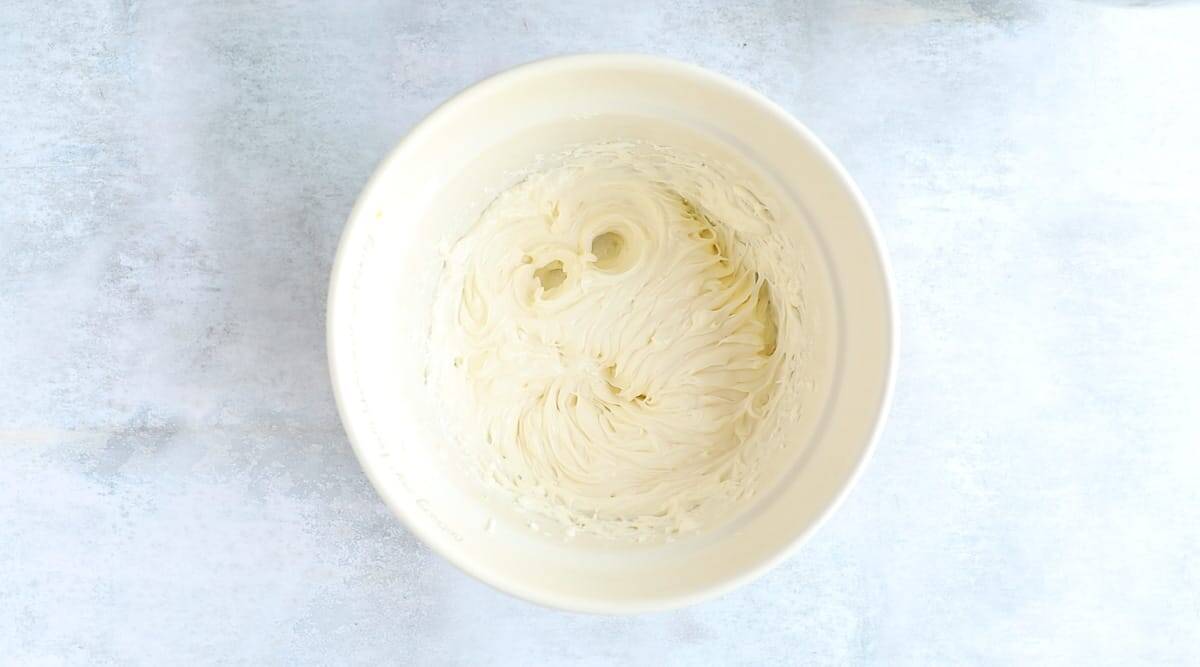
Step One: To make a cheesecake filling put the cream cheese and icing sugar into a mixing bowl and beat it for a minute or two until it's smooth and creamy.
At this point add the vanilla extract (as per this recipe for vanilla cheesecake) or you can add any other flavourings such as melted chocolate.
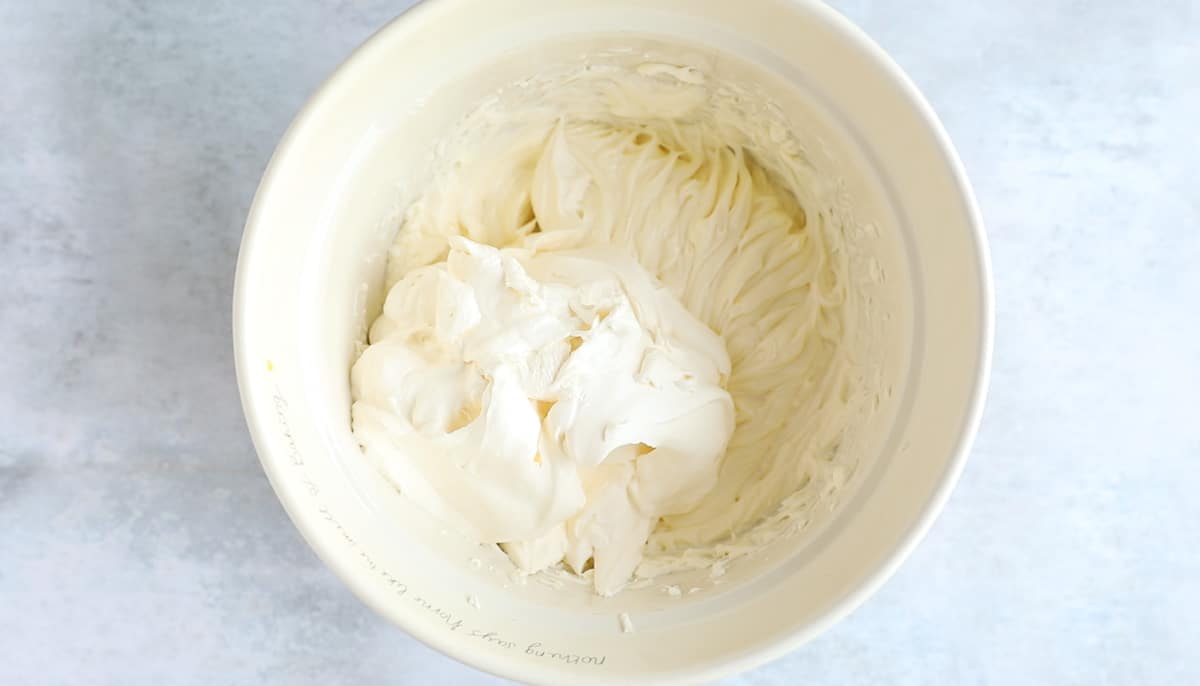
Step Two: Next, in a separate bowl whisk the double cream until it reaches stiff peaks and is completely holding its shape. This will take 3-4 minutes using a handheld electric mixer on a medium speed.
Step Three: Gently fold the whipped cream into the cream cheese mixture and add it on top of the biscuit crust.
Step Four: Push the filling up the sides of the tin to get rid of any trapped air bubbles and smooth the top of the filling with a palette knife, or similar.
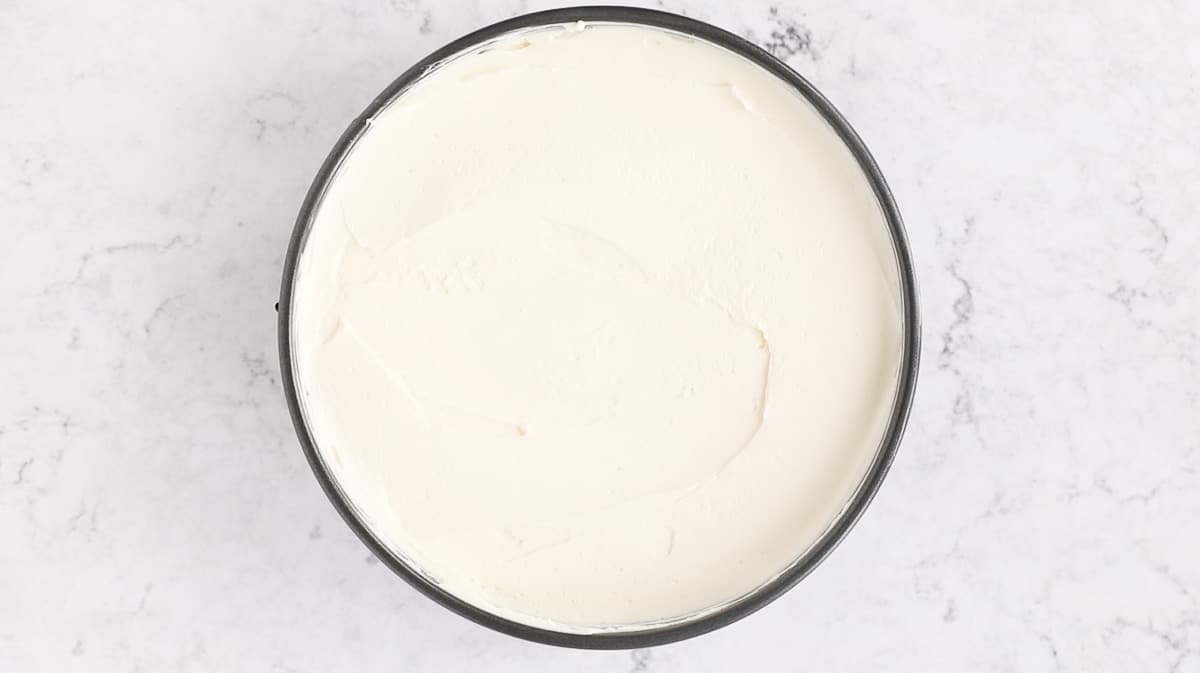
Step Five: Now cover the entire tin with clingfilm and put it in the fridge for at least 6 hours. Although it's far preferable to leave a no-bake cheesecake overnight to ensure it sets properly. At this point, you could leave it in the fridge for 2 days if you want to.
When adding other ingredients, to ensure your cheesecake sets I would not recommend adding any more than 300g of extra fillings.
If you don't like a plain vanilla cheesecake and you're not keen on adding chocolate, one of the easiest ways to add flavour is by using lemon zest and juice to make a lemon cheesecake.
Amy's top tip: the foolproof method for getting cheesecake to set is by whipping the cream separately. There are recipes for adding the cream straight into the cream cheese filling and whisking them together. This method can cause real problems because it can be difficult to tell when to stop whisking. If you whisk too much, the filling will turn to soup and it's unrecoverable. Since most people know what stiffly whipped cream should look like, this is the best way of making sure your filling will set.
How to remove cheesecake from the tin
Once your cheesecake has been in the fridge for a minimum of six hours you can remove it from the tin and decorate it.
Remember: no-bake cheesecakes will still have a slight ‘wobble’ and often mousse-like texture they will NOT set like a baked cheesecake.
If using a loose-bottomed tin, put the bottom of the tin on a can of baked beans (or similar) and use both hands to gently pull the sides of the tin down.
This is much easier than attempting to push the bottom of the tin up and ending up with the main part of the tin hanging from your elbow!
If you have used a springform tin, run a sharp knife around the edge of the cheesecake to free the biscuit crust from the sides of the tin. Unclip and remove the main part of the tin.
To get the base of the tin off the cheesecake, run a large sharp knife around the entire circumference underneath the cheesecake.
Use a cake lifter or two large knives to ease the cheesecake away from the base and transfer it to a cake stand or plate.
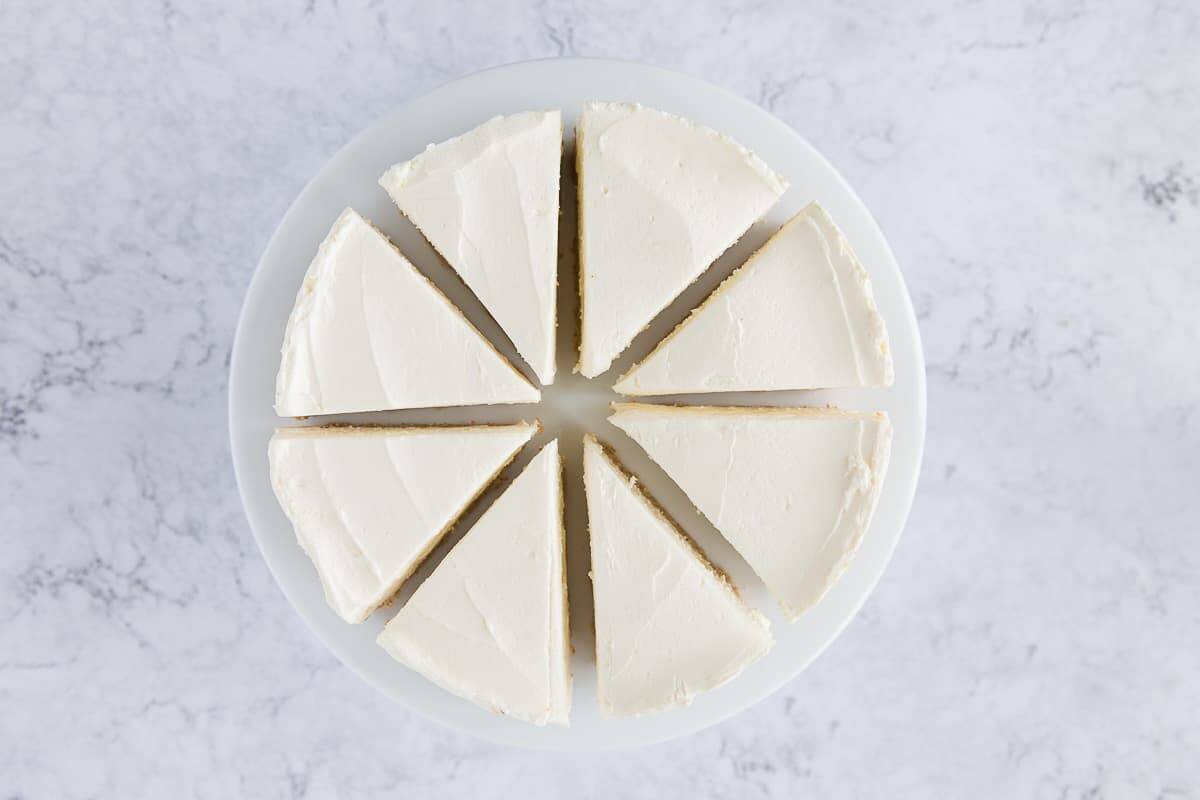
When it's time to slice your cheesecake use a sharp knife so that the base doesn't break when you cut into it.
Amy's top tip: if the sides (filling) of your cheesecake look untidy, just run a palette knife or butter knife around the edge until it looks nice and smooth.
Toppings
Ah, no-bake cheesecake toppings. This is where you can really go to town. Cheesecakes can be topped, smothered and drizzled with a whole manner of yumminess.
The possibilities are endless!
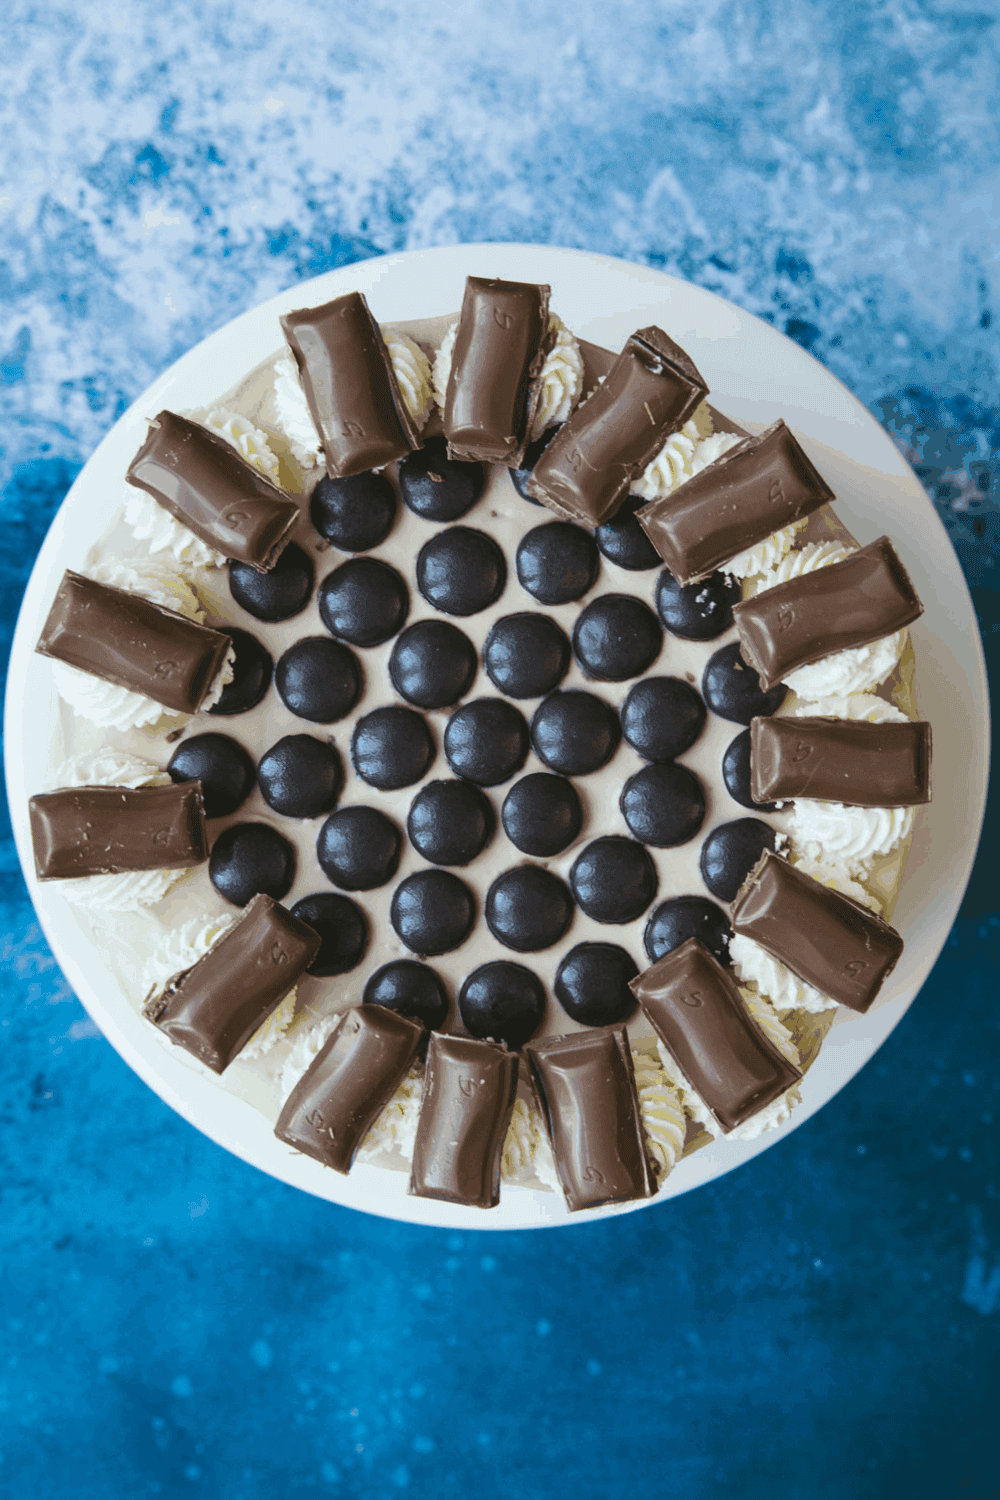
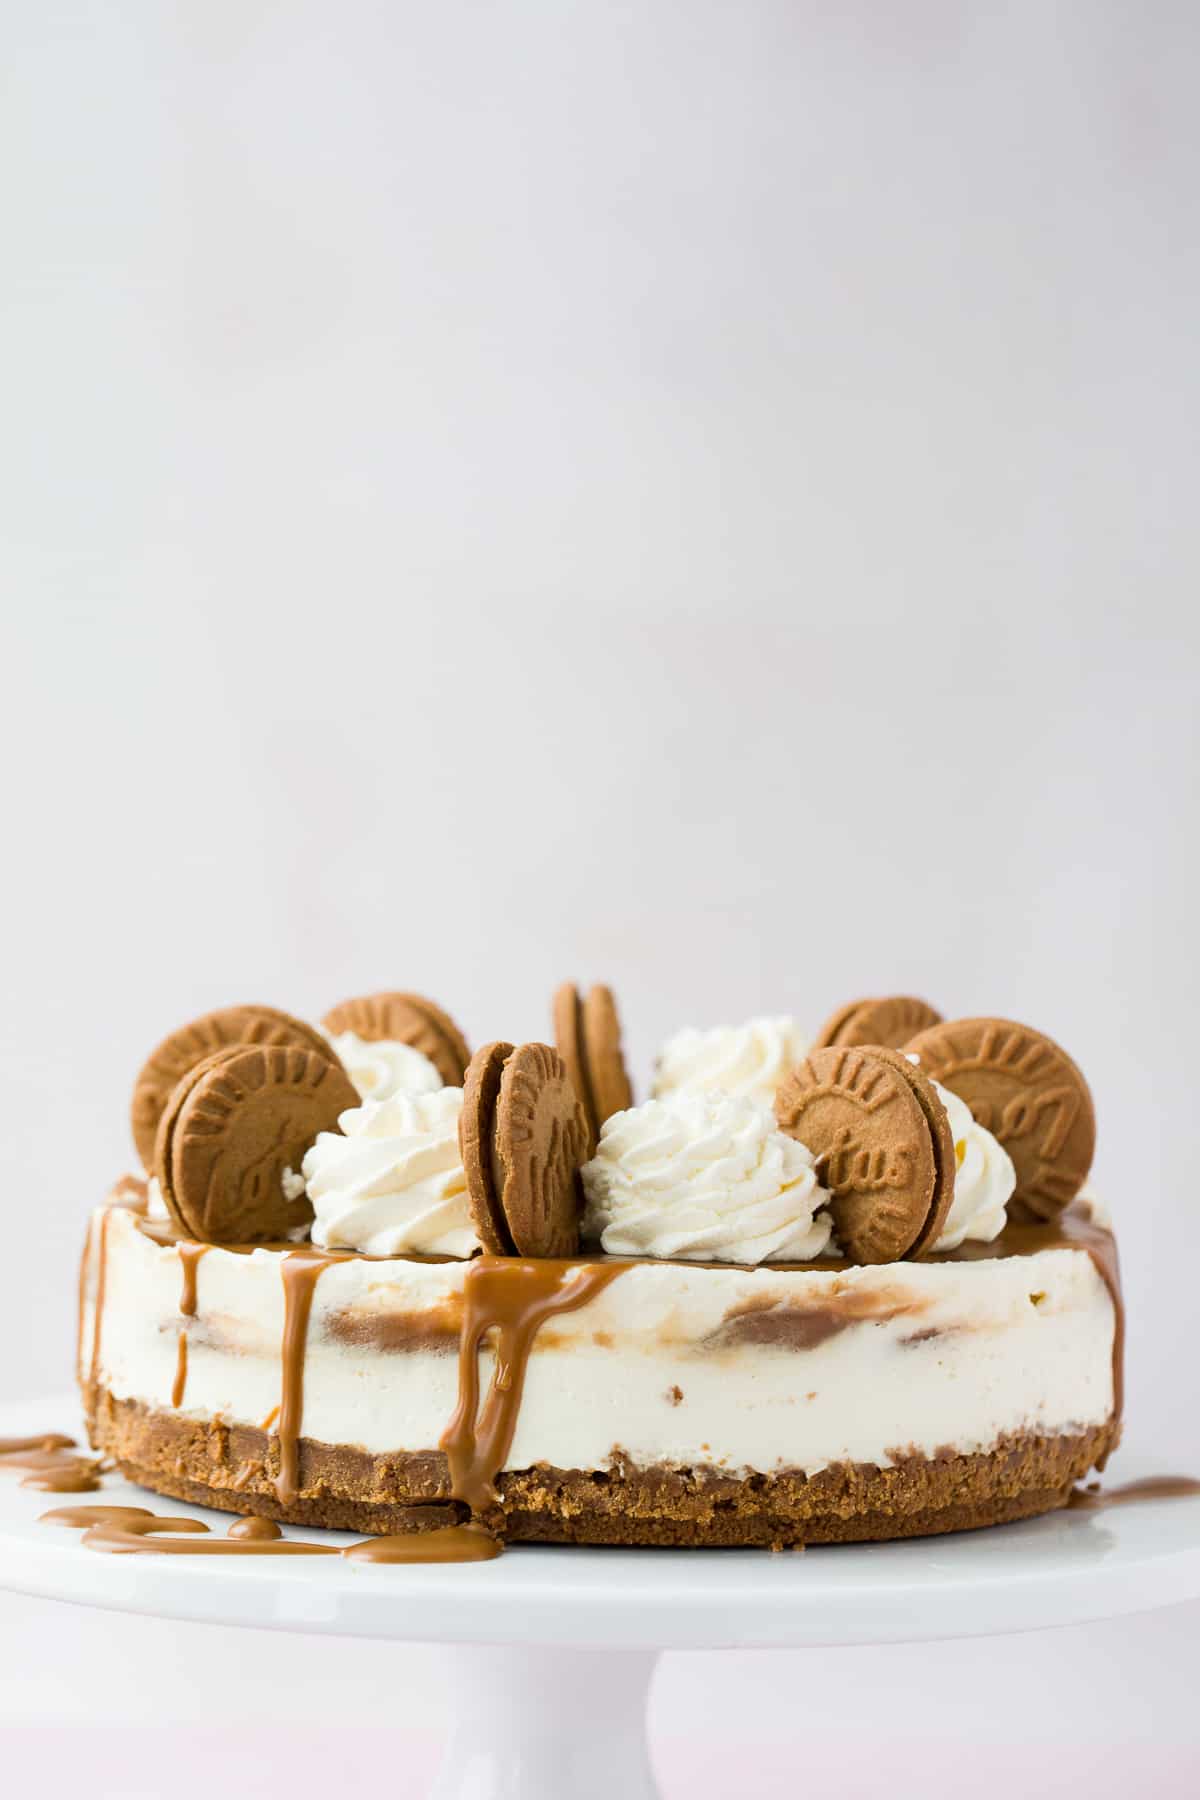
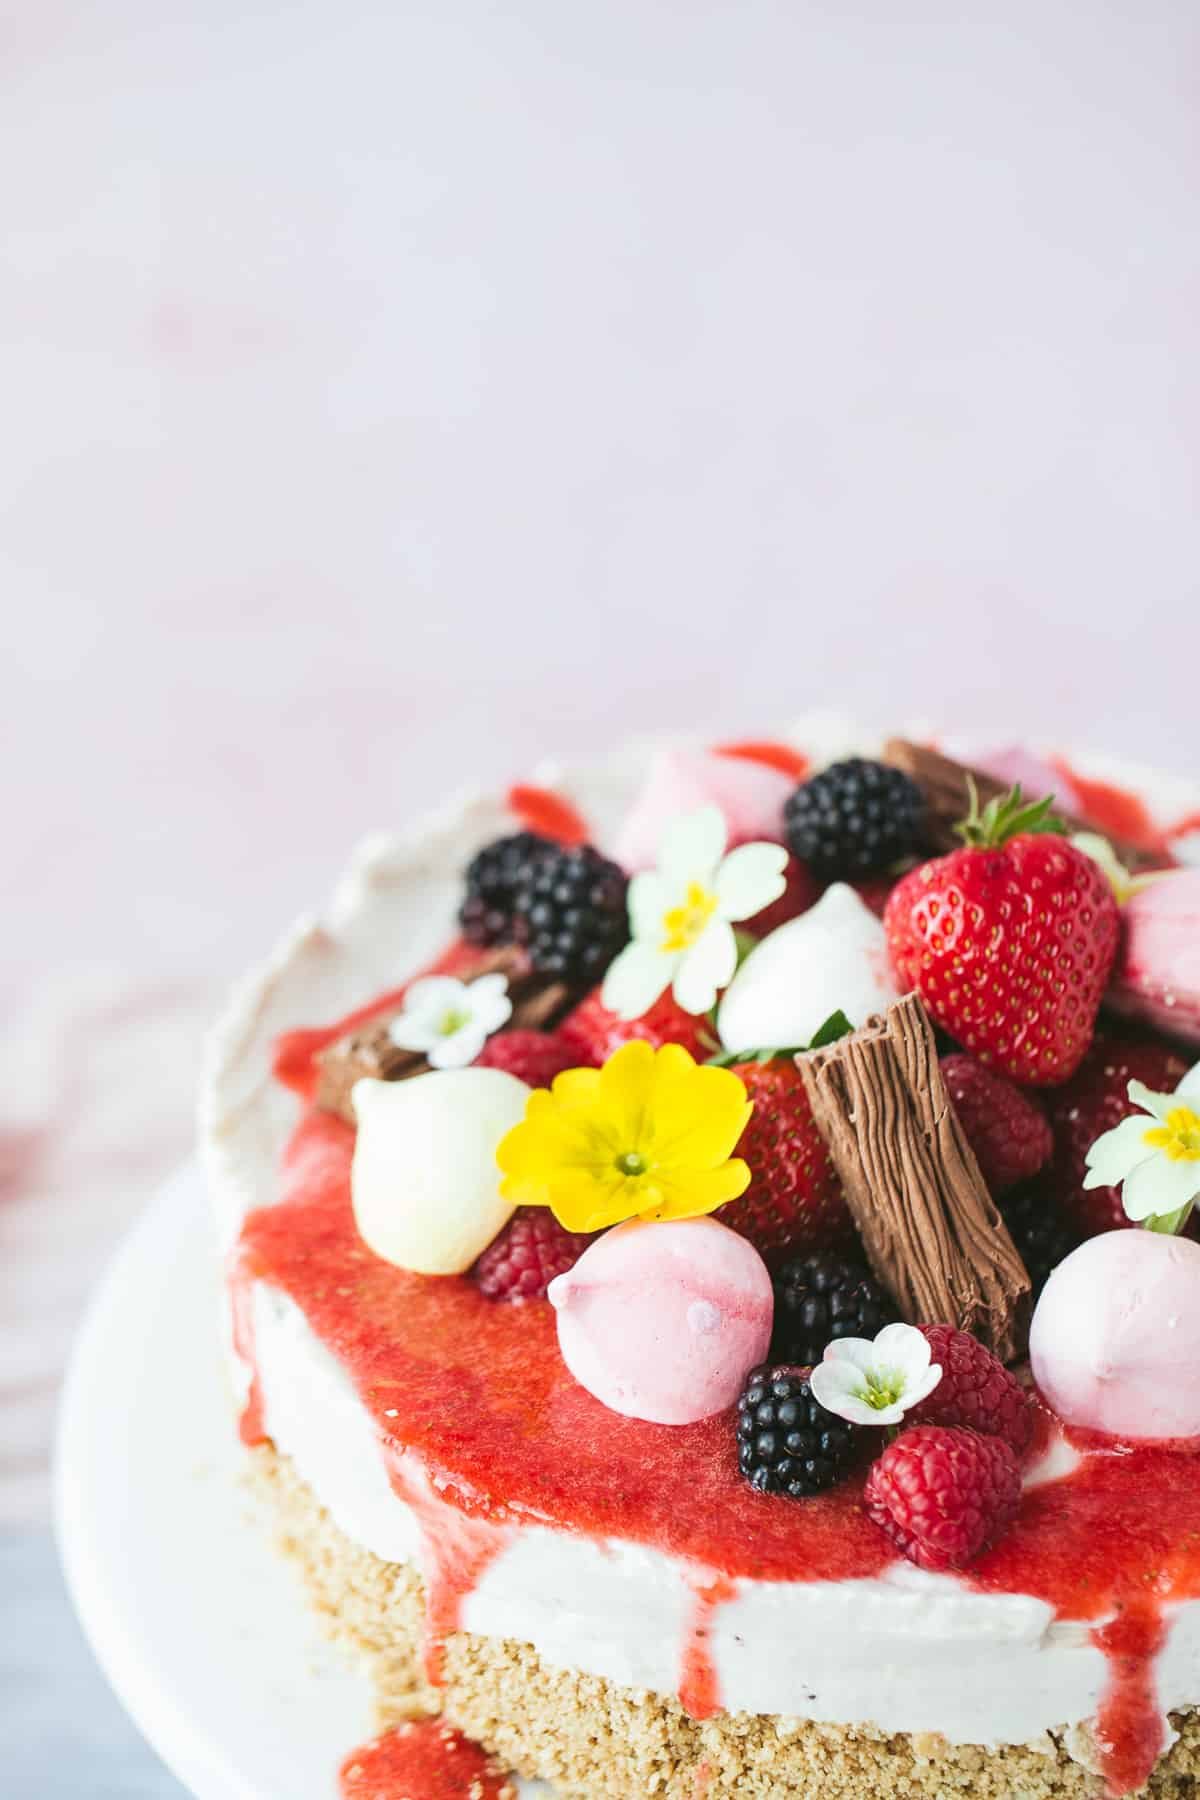
You can add fruit coolis, mini meringues and edible flowers like my Eton Mess Cheesecake. This Biscoff Cheesecake is drizzled with warm Lotus spread. Or you could even add a layer of chocolate ganache, like the topping on my Bounty Cheesecake.
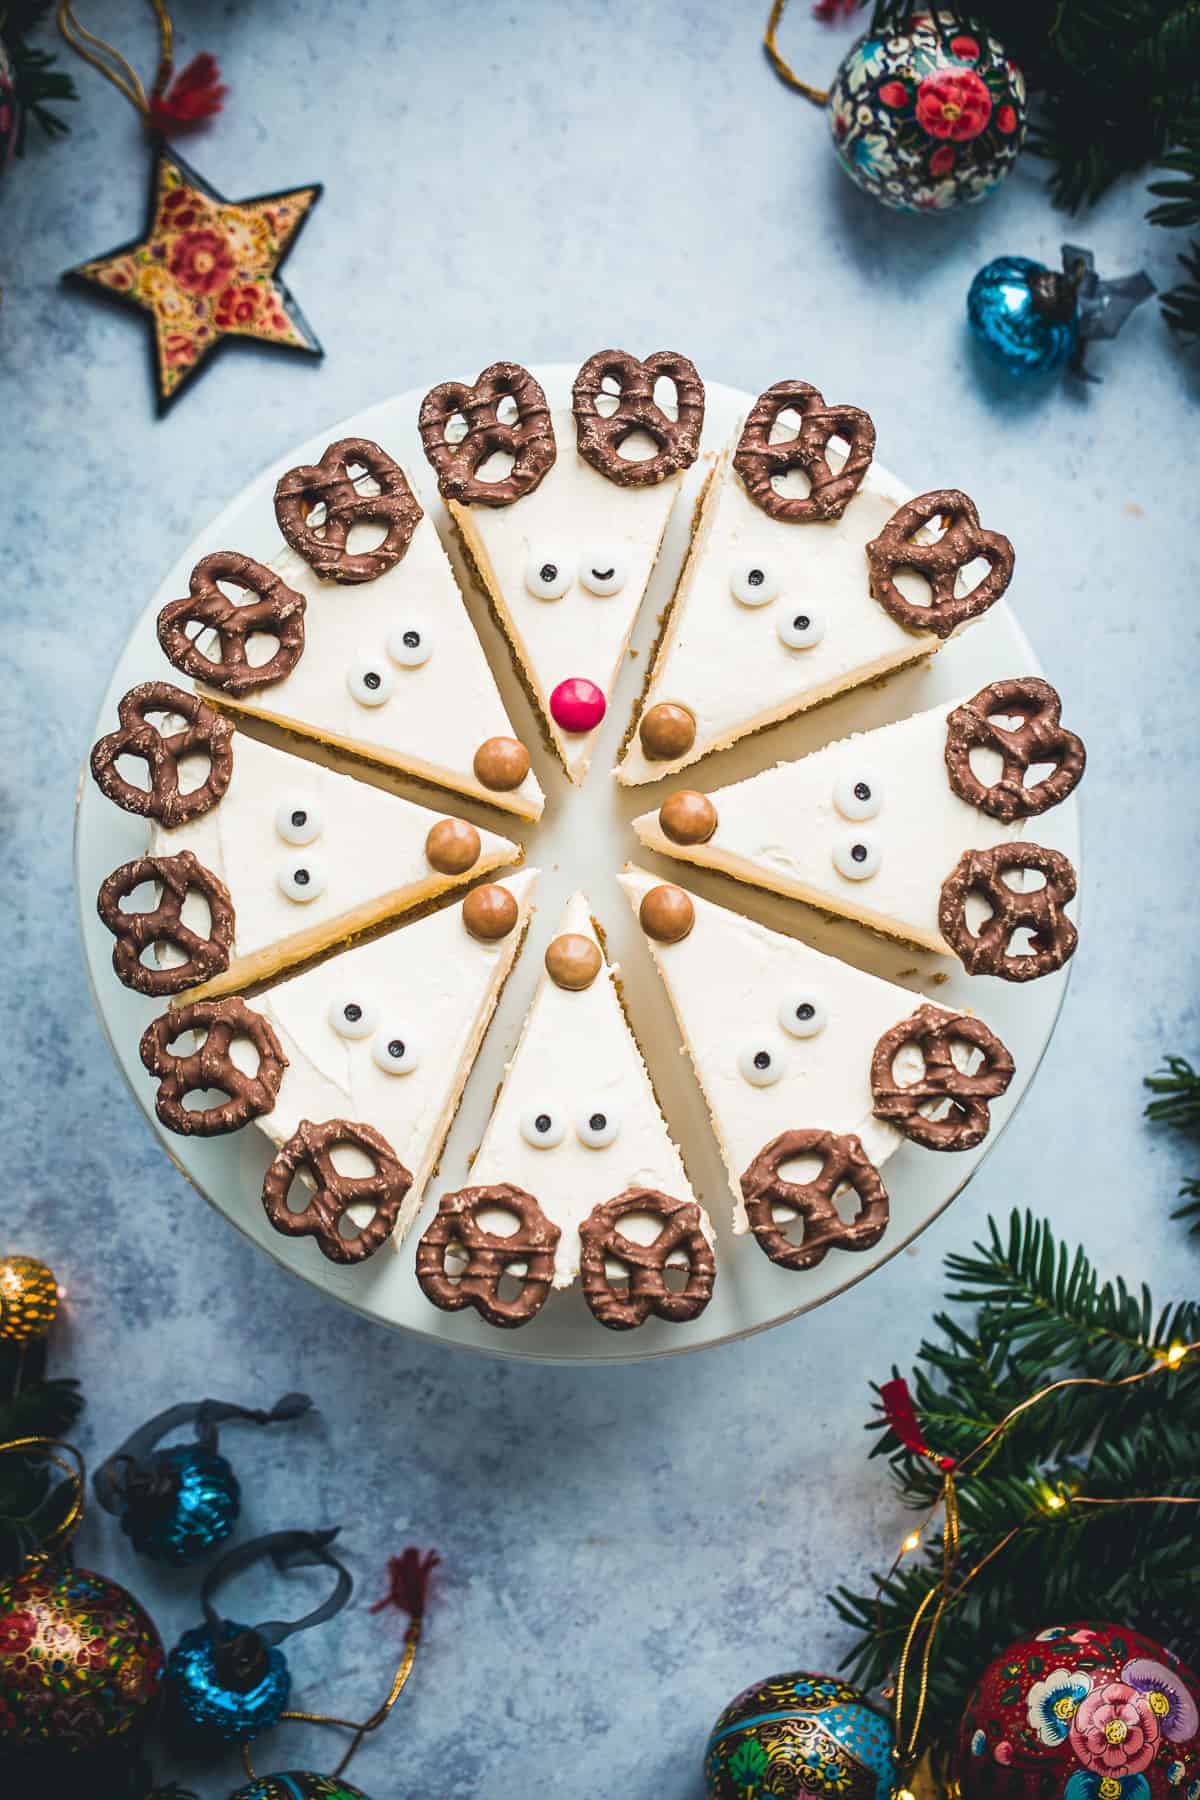
No-bake cheesecakes are also the perfect excuse to do some novelty toppings. I made this Reindeer Christmas Cheesecake and also loved designing my Strawberry Santa White Chocolate Cheesecake.
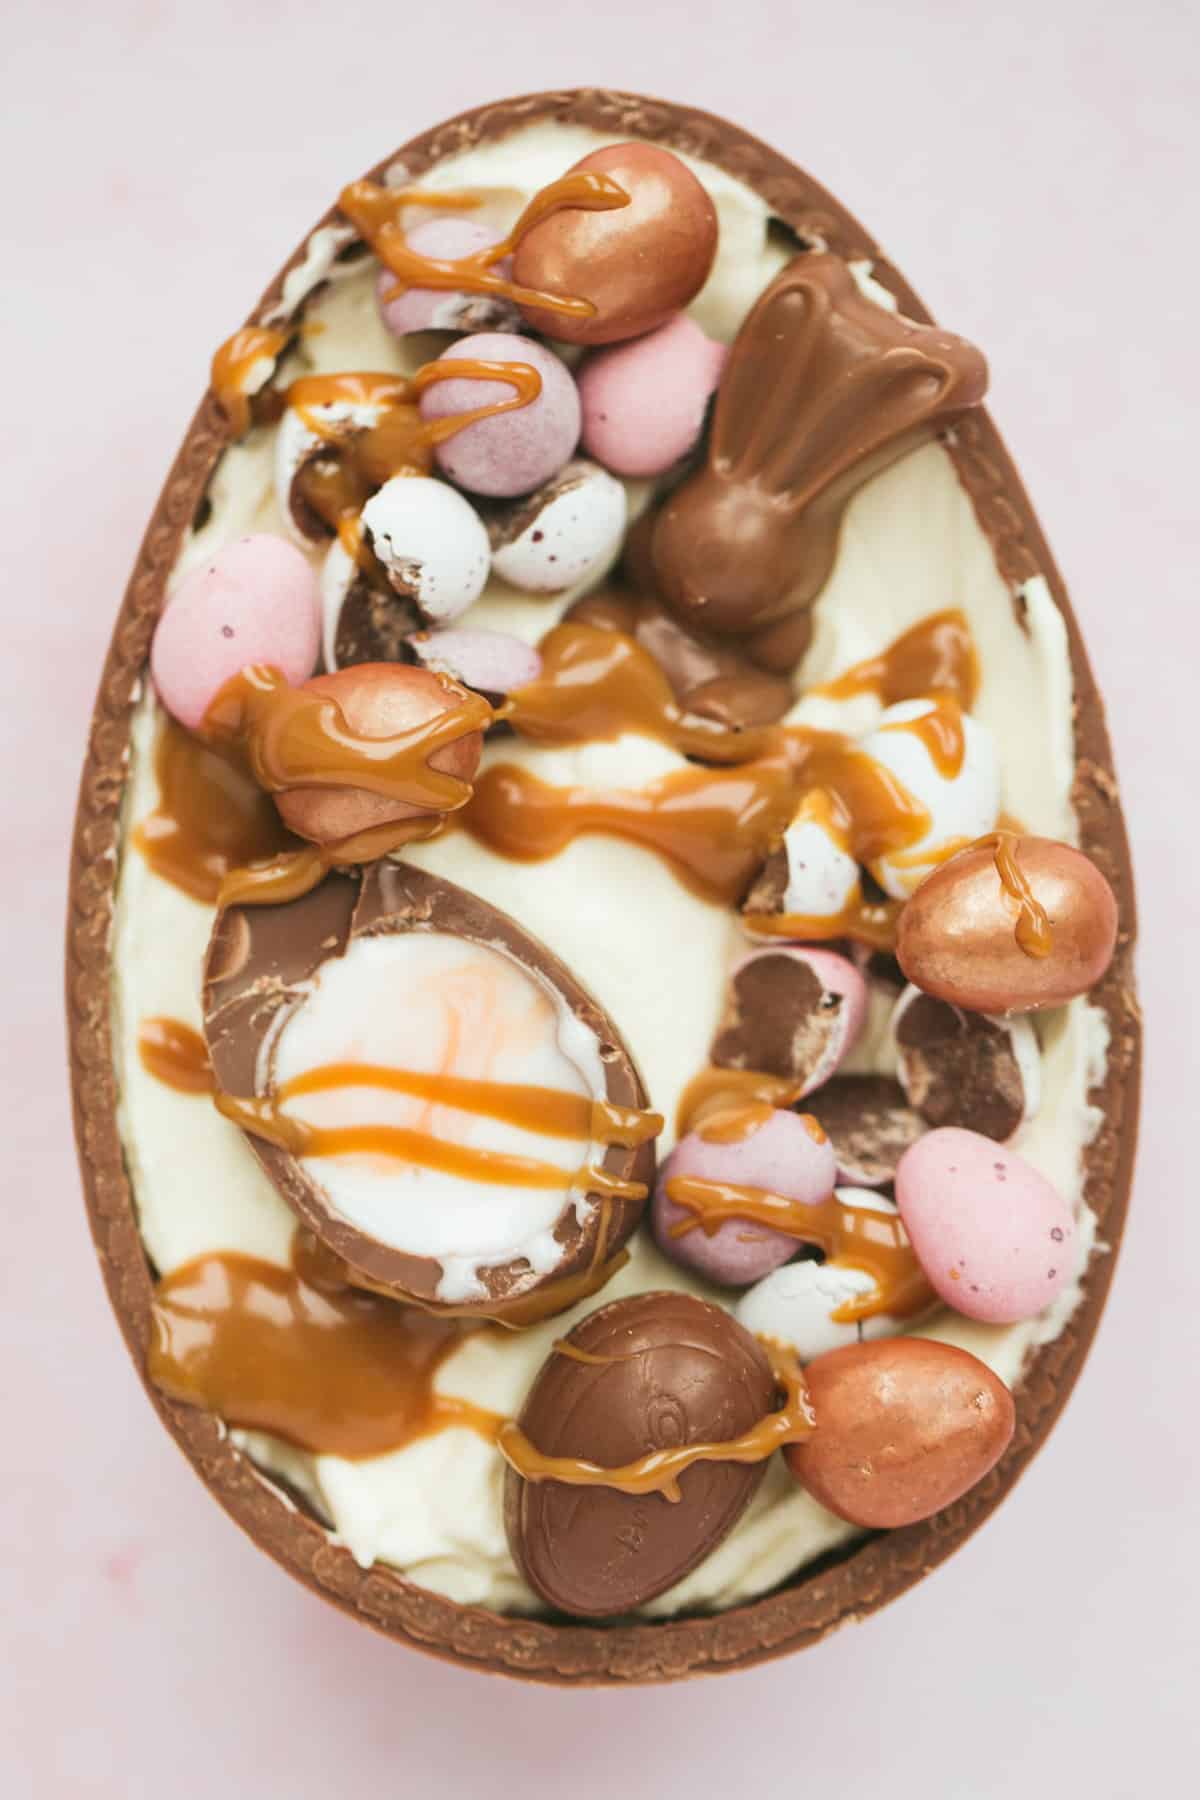
My favourite cheesecake recipe ever has to be my Easter Egg Cheesecake which uses a chocolate Easter egg shell to house the biscuit base and filling and is topped with so many Easter goodies!
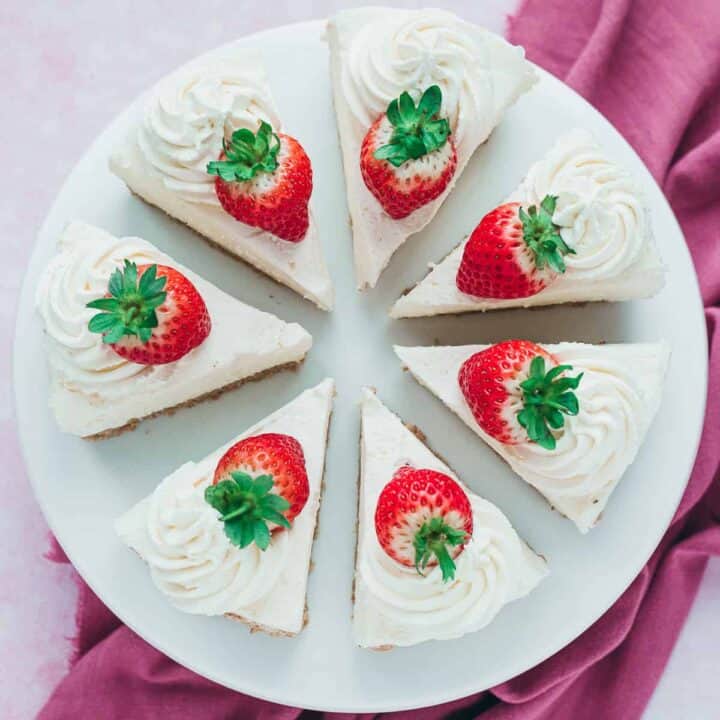
For this vanilla cheesecake, I kept it really simple by adding large cream swirls and a strawberry for each slice.

When I use cream for decoration I use 150mls of double cream and 3 tablespoons of icing sugar. I whisk the cream and icing sugar until soft peaks - otherwise, the cream decoration can look curdled. Transfer to a piping bag fitted with a Wilton tip and pipe large swirls.
My favourite tips for piping:
Make it vegan
With all this talk of cream cheese and double cream, some of you might be wondering if it's possible to make a vegan no-bake cheesecake.
The answer is a resounding yes!
This Raw Berry Cheesecake uses ingredients like almonds and dates for the base with cashew nuts and frozen bananas for a delicious creamy filling.
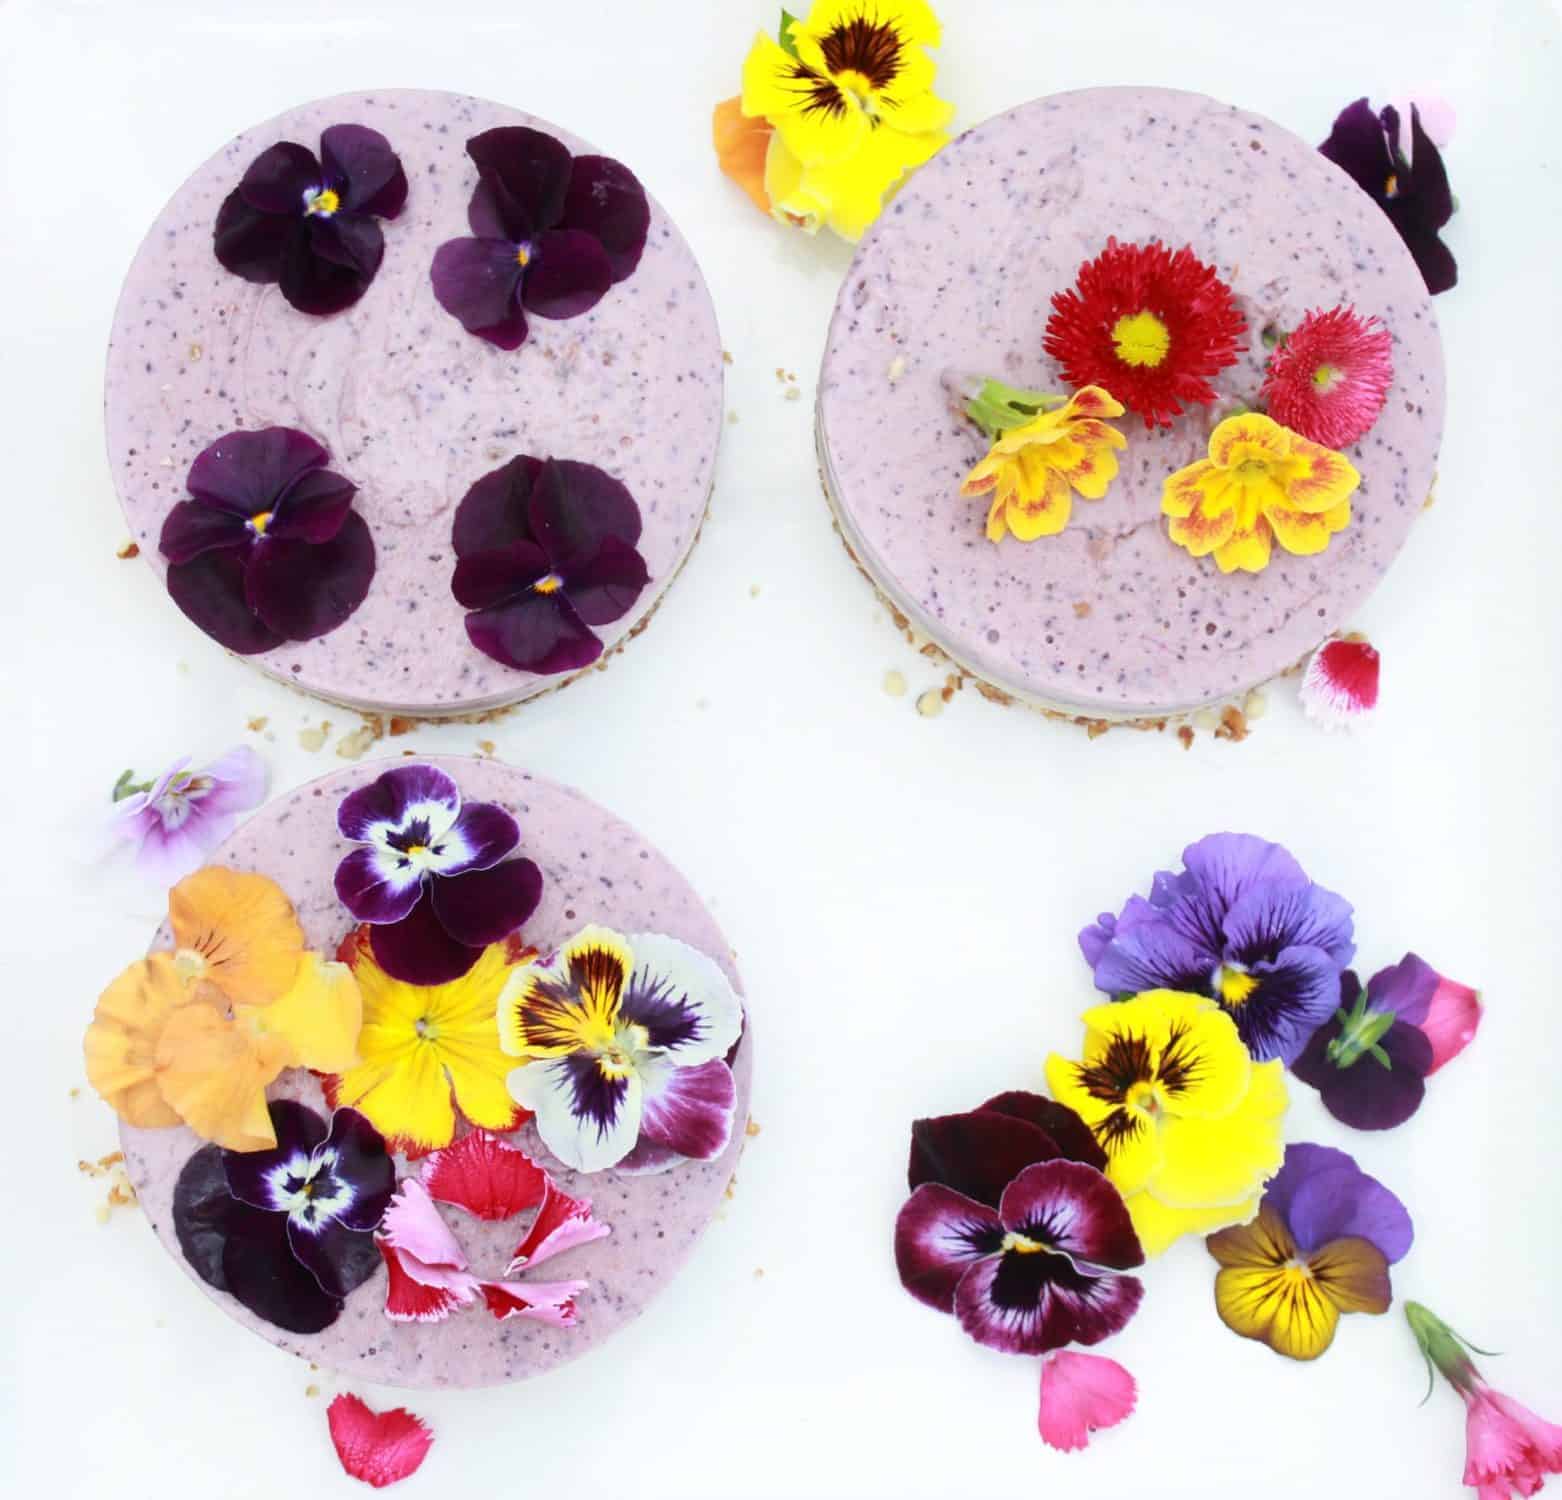
It's also gluten-free which makes it a great option for people with dietary requirements.
Make ahead, storage and freezing
Make ahead: As a no-bake cheesecake of any type needs at least 6 hours to set in the fridge (but preferably 12 hours) this is a brilliant make-ahead dessert. You can also assemble the cheesecake and leave it in the fridge for up to two days before you decorate it.
Storage: A finished cheesecake should be wrapped in clingfilm and stored in the fridge. It will keep for 3-4 days.
Freezing: Undecorated no-bake cheesecake freezes really well for 3 months. However, you must allow it to completely set in the fridge before it is frozen. To eat it, defrost for 12 hours in the fridge and then decorate and store as above.
Vanilla No-Bake Cheesecake
Velvety-smooth, silky, creamy and light with a crisp buttery crust. Decorated with swirls of softly whipped cream and plump sweet strawberries.
Ingredients
- 250g Digestive biscuits, (Graham Crackers)
- 125g (½ cup) unsalted butter, melted
- 680g (3 cups) full-fat cream cheese, (I use Philadelphia) at room temperature
- 100g (½ cup) icing sugar, (powdered sugar, confectioner's sugar)
- 2 teaspoon vanilla extract
- 1 teaspoon lemon juice, optional
- 300ml (1 ¼ cups) double cream, (heavy whipping cream)
to decorate
- 150ml (½ cup) double cream, (heavy whipping cream)
- 3 tablespoon icing sugar, (powdered sugar, confectioner's sugar)
- 12 strawberries
Instructions
- Blitz the biscuits into crumbs then add the melted butter and mix well. Tip the mixture into a 20cm springform tin and press down until smooth and level. Put in the fridge to chill while you make the filling.
- Add the cream cheese to a large mixing bowl and beat until smooth. Add the icing sugar, vanilla extract and lemon juice and beat until completely smooth.
- In a separate bowl, whisk the double cream until it reaches stiff peaks. Gently fold the double cream into the cream cheese mixture until fully combined.
- Transfer the cheesecake filling on top of the biscuit base and use a spatula to smooth the top. Refrigerate for at least 6 hours but preferably overnight.
- To decorate, whip the double cream and icing sugar together until the mixture reaches soft peaks. Transfer to a piping bag fitted with an open star nozzle and pipe swirls of whipped cream on top of the cheesecake. Add a strawberry to each swirl. Slice and serve.
Notes
- For perfect no-bake cheesecake every single time, please review the information under each heading in the recipe blog post above the recipe card.
- A teaspoon of fresh lemon juice adds a good flavour but is not essential.
- I used a 20cm (8") springform tin but a 20cm (8″) loose-bottomed deep cake tin will also work well.
- Make sure the cream cheese is full fat AND at room temperature.
- At the double cream whisking stage ensure you whip the cream to stiff peaks. Then fold it gently into the cream cheese mixture so you don’t knock the air out. This will ensure your cheesecake sets properly.
- A no-bake cheesecake needs at least 6 hours to set but overnight in the fridge is best. Remember: no-bake cheesecakes will still have a slight ‘wobble’ and often mousse-like texture they will NOT set like a baked cheesecake.
- To remove the cheesecake from the base of the tin slide a sharp knife between the bottom of the cheesecake and base of the tin. Then move the knife around in a full circle until the cheesecake loosens.
- Slice into pieces using a knife sharp enough to cut through the base so it doesn’t break.
- Storage: leftovers should be stored in the fridge and will keep for 3-4 days. Vanilla Cheesecake freezes well (without decoration) for up to 3 months.
Nutrition Information:
Yield: 12 Serving Size: 1 gramsAmount Per Serving: Calories: 517Total Fat: 42gSaturated Fat: 24gTrans Fat: 1gUnsaturated Fat: 0gCholesterol: 132mgSodium: 297mgCarbohydrates: 31gFiber: 1gSugar: 19gProtein: 6g


Jenn
Thank you so much for the detailed explanations, tips & recipe~
I usually skip all recipes without metric measurements....
Great day!!!!
Amy Treasure
Hi Jenn, so glad you liked the recipe!
SY
Hi, I'd love to try your recipe, but may I know what I should do if I only have whipping cream (35% fat) and I don't have gelatin or agar? Like, do I increase the amount of whipping cream and by how much? Thanks
Waseem
This post is a cheesecake lover’s dream! I like that you didn’t just rank the recipes but also explained why they turned out the way they did. The tips about water baths, crust types, and baking temperature are super practical and will help a lot when trying these recipes at home.