


A five-layer Kinder Bueno Cake made from a rich chocolate sponge with Nutella buttercream frosting, topped with Kinder Bueno and Kinder chocolate, finished with a white chocolate gold drip.

For this recipe, you will need: dark chocolate, unsalted butter, light brown soft sugar, eggs, plain flour, baking powder, bicarbonate of soda, salt, semi-skimmed milk, vanilla extract, Nutella, icing sugar, Kinder chocolate (to decorate) white chocolate, vegetable oil and gold food paint (for the drip).
THIS KINDER BUENO CAKE IS:
- An impressive 5 layers
- Decadent thanks to the a rich chocolate sponge
- Covered in delicious Nutella Buttercream icing
- Decorated with lots of Kinder chocolate
- An awesome centrepiece due to the white chocolate gold drip!
This Kinder Bueno Cake is one heck of a showstopper, It's a perfect celebration cake that everyone will love thanks to its super-rich, moist and decadent chocolate sponge.
It's smothered in Nutella buttercream and decorated with an array of Kinder Chocolate.
Baking this cake and coming up with the white chocolate drip painted gold was an absolute joy and the look on my husband's face when it was presented on his birthday was priceless!
Kinder Bueno is one of my husband's favourite chocolate bars so I knew I wanted to incorporate it into his birthday cake.
Who can resist the melt-in-the-mouth creamy hazelnut and smooth chocolate with its crisp wafer? Stick it on a chocolate cake and you have a match made in heaven!
The base recipe for this Kinder cake is my go-to decadent chocolate sponge recipe. The chocolate sponge is dense and moist and although it does take a little more effort than a standard chocolate cake it really is worth it.
This cake will stay deliciously moist for days and will intensify in flavour - although, it is so good that you probably won't get the chance to find out considering every time I make this cake people are fighting over the last piece!
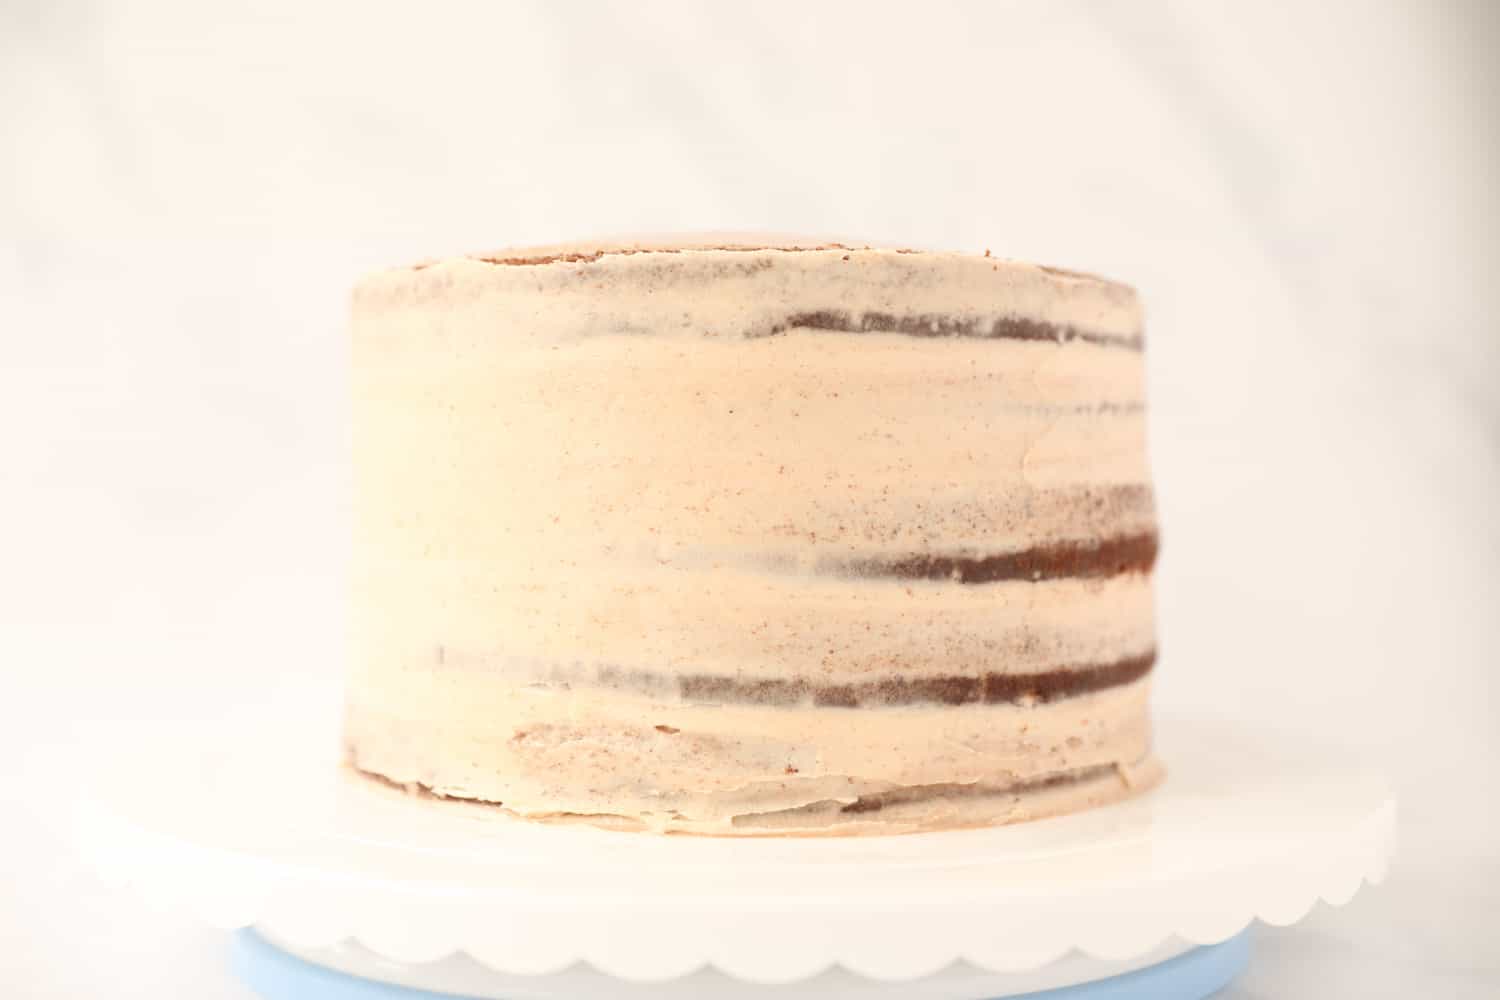
This cake can be baked in two 20cm (8-inch tins) OR split into 4 or 5 layer cake tins to make a tall layer cake. My personal preference is to make 5 layers and pile on the Nutella buttercream in-between.
The Kinder chocolate decorations look so good piled high on a tall and impressive looking cake.
I use the Wham layer cake tins which are really cheap on Amazon and amazing at creating layer cakes. I can't be bothered with cutting cakes in half to layer them up as can never get even layers.
Individual tins are a Godsend and make my life so much easier. There are 5 tins and they all fit in one oven so you can bake all the layers at the same time. I highly recommend them!
As Kinder Bueno has hazelnut flavouring I flavoured the buttercream for this cake with Nutella.
I couldn't use Kinder Bueno because it won't melt down smooth due to the wafers used in the chocolate so using Nutella was the next best thing.
The buttercream is my simple vanilla buttercream recipe flavoured with Nutella.
The Nutella also gives the buttercream a nice colour and looked really good against the white chocolate drip that I painted gold.

HOW TO MAKE A KINDER BUENO CAKE
This Kinder Bueno Cake is made from my go-to chocolate sponge recipe, it's the recipe I use when I want to bake a special occasion cake.
There are a few more steps than a typical chocolate cake, but as I mentioned it will be so worth it.
Follow the instructions below to make your chocolate sponge, scroll down to the step by step images to help you.
The quantities needed are in the recipe card at the bottom of the page and there's a video to give you a visual too!
- Preheat the oven to 190ºC/ 170ºC Fan/ Gas 5
- Melt the dark chocolate in short 30 second bursts in the microwave, stirring each time. Set aside to cool.
- Cream the butter and sugar until lighter in colour and smooth.
- Beat the egg yolks until they've doubled in volume.
- Gradually add the egg yolks to the creamed butter and sugar, beating well.
- Add the cooled chocolate and beat well to combine.
- In a separate bowl, combine the flour, baking powder, bicarbonate of soda and salt.
- In a jug, combine the milk and vanilla extract.
- Add half the flour to the creamed mixture and beat well, then add half the milk and beat. Repeat with the remaining flour and milk.
- In a separate bowl, beat the egg whites to soft peaks then fold the egg whites into the cake batter. Fold very gently so you don't knock the air out of the mixture!
- Divide the mixture evenly between your tins. Please note: I don't grease and line my cake tins using the traditional method, I spray them with Wilton's Cake Easy and have never had a problem with cakes sticking.
- If using shallow layer tins, your cakes will probably be baked after 20 minutes. If using 2 tins then they'll take around 30 minutes. The cakes are ready when a skewer inserted into the middle comes out clean.
- Leave the cakes to completely cool while you make the buttercream
- For the buttercream add the butter (make sure it's room temperature) to a stand mixer and beat it until it's creamy using the paddle attachment. This will take 3-5 minutes or longer if you're using a handheld electric whisk.
- Add the icing sugar a tablespoon at a time (so that you don't end up enveloped in a cloud of icing sugar!) Beat for a few minutes until the icing sugar is completely incorporated.
- Add a teaspoon of vanilla extract and 200g of Nutella to the buttercream and beat until fully combined.
- If your buttercream is too thick add a tablespoon of milk or double cream if it's too thin add icing sugar a tablespoon at a time until it reaches the desired consistency.
- Once your cakes have cooled you can turn them out from the tins and you're ready to assemble the Kinder Cake.
- Begin by adding the first layer of chocolate sponge to a turntable or cake board. Spread with Nutella buttercream and repeat until the cake is fully assembled.
- Use a piping bag (without a nozzle) or a palette knife to spread Nutella buttercream around the outside edges and top of your cake. I use a large cake spreader to get a smooth finish.
- Next, it's time for the white chocolate gold drip - See How to Make Gold Drip below.
- Fit a piping bag with a nozzle (I use Wilton 1M) and fill it with remaining buttercream. Pipe swirls around the top of the cake.
- Add Kinder Chocolate decorations around the bottom and on top of the cake and your masterpiece is complete!
STEP BY STEP IMAGES - HOW TO MAKE THE CHOCOLATE CAKE


STEP BY STEP IMAGES - HOW TO MAKE THE NUTELLA BUTTERCREAM


HOW TO DECORATE A KINDER CAKE
To decorate the cake I used small Kinder chocolate bars, a Nutella and Go, original and white chocolate Kinder Buenos and of course, a Kinder egg.
You can make your cake as simple or complicated as you wish. You might want to pipe buttercream swirls and top each swirl with a piece of Kinder Bueno or cover the entire cake with Kinder chocolate. It's entirely up to you.

HOW TO MAKE GOLD DRIP
This cake will work perfectly with or without the drip - and you might not want to go the whole hog and paint the drip gold.
As always, I'm "extra" when it comes to decorating my cakes! It's not difficult at all to master drip action on a cake and the gold paint really didn't take too long at all. It's a nice touch if you fancy it!
I use gold food paint that you can paint on directly, in this case straight onto white chocolate that I melted and mixed with a little vegetable oil to stop the chocolate from seizing.
I find food paints that you can use directly much less faff than food paints that need to be mixed with something.
Gold drip is really easy. You only need about 100g of white chocolate, a couple of teaspoons of vegetable oil and edible gold food paint.
The food paint I use is made by Rainbow Dust and it's ready to use - meaning you can paint it directly onto things. The colour used for this cake was Dark Gold.
Melting white chocolate can sometimes be tricky because it does have a tendency to seize, however, if you use the Dr Oetker white chocolate you can safely melt it in short bursts in the microwave and it will be absolutely fine.
If you do choose a different brand of white chocolate you might need to melt it using the Bain Marie method ( a bowl over a pan of simmering water) this will ensure the chocolate doesn't seize as it's heating up.
Once you've got your white chocolate melted, add a teaspoon or two of vegetable oil. The vegetable oil stops the chocolate from seizing as it cools down and also makes it easier to drip.
You can achieve a good drip with a teaspoon or a squeezy bottle. My preference is a squeezy bottle because it's more accurate.
You need to let your chocolate cool so it doesn't make the buttercream icing on the cake run.
Add the chocolate to a squeezy bottle if you're using one and put it to one side until its needed.
Pop the iced cake into the fridge for 10 minutes while your chocolate cools.
Once the buttercream icing has set, you're ready to add the drip!
Practice squeezing on the edge of a bowl so you can determine the flow of the chocolate. If it runs too quickly then leave it for a few minutes and test it again.
Start squeezing the chocolate onto your cake or use a teaspoon to drip the chocolate over the edges.
You can do shorter or longer pours to get a variety of drip lengths but it's really just a case of going for it and seeing what happens.
Put the cake back into the fridge until the chocolate drip doesn't feel tacky when you touch it.
White chocolate will not completely set and go hard but it needs to be dry before you paint it.
Once it's dry, use a small food-safe paintbrush and paint the gold colouring directly on top of the white chocolate.
It's as easy as that and really quite therapeutic, and it looks so pretty too!


I hope you enjoy making and eating this delicious Kinder Bueno Cake as much as I do. It is a little extra effort but the results are pretty impressive :)
MORE CAKE RECIPES:
- Victoria Sponge Cake
- Lemon Cake
- Coffee Cake
- Gingerbread Bundt Cake
- Black Forest Cake
- School Cake
- Chocolate Sprinkle Cake
- Jam and Coconut Sponge Cake
- Date and Walnut Cake
- Golden Syrup Cake
If you loved this recipe I would really appreciate it if you'd leave me a 5-star rating below and leave a comment.

Kinder Bueno Cake
Decadent and rich 5 layer chocolate sponge cake with Nutella buttercream icing and decorated with Kinder chocolate and a white chocolate gold drip.
Ingredients
For the Chocolate Layer Cake
- 230 g dark chocolate , 70% cocoa
- 170 g unsalted butter, at room temperature
- 350 g light brown soft sugar
- 3 large eggs, yolks separated from whites
- 370 g plain flour, sifted
- 1.5 teaspoon baking powder
- 1.5 teaspoon bicarbonate of soda
- 0.5 teaspoon salt
- 500 ml semi-skimmed milk
- 2 teaspoon vanilla extract
For the Nutella Buttercream
- 250 g unsalted butter, at room temperature
- 500 g icing sugar
- 1 teaspoon vanilla extract
- 200 g Nutella
For the White Chocolate Gold Drip
- 100 g white chocolate, I use Dr Oetker
- 2 teaspoon vegetable oil
- Rainbow Dust Gold Food Paint
To decorate the Kinder Cake
- 4 bars Kinder Bueno
- 1 bar White Chocolate Kinder Bueno
- 3 bars Kinder chocolate
- 1 Nutella and Go
- 1 Kinder Egg
Instructions
To make the Chocolate Layer Cake
- Preheat the oven to 190ºC/ 170ºC Fan/ Gas 5
- Melt the dark chocolate in short 30 second bursts in the microwave, stirring each time. Set aside to cool.
- Cream the butter and sugar until lighter in colour and smooth.
- Beat the egg yolks until they've doubled in volume.
- Gradually add the egg yolks to the creamed butter and sugar, beating well.
- Add the cooled chocolate and beat well to combine.
- In a separate bowl, combine the flour, baking powder, bicarbonate of soda and salt.
- In a jug, combine the milk and vanilla extract.
- Add half the flour to the creamed mixture and beat well, then add half the milk and beat. Repeat with the remaining flour and milk.
- In a separate bowl, beat the egg whites to soft peaks then fold the egg whites into the cake batter. Fold very gently so you don't knock the air out of the mixture!
- Divide the mixture evenly between your tins. Please note: I don't grease and line my cake tins using the traditional method, I spray them with Wilton's Cake Easy and have never had a problem with cakes sticking.
- If using shallow layer tins, your cakes will probably be baked after 20 minutes. If using 2 tins then they'll take around 30 minutes. The cakes are ready when a skewer inserted into the middle comes out clean.
- Leave the cakes to completely cool while you make the buttercream.
To make the Nutella Buttercream
- For the buttercream add the butter (make sure it's room temperature) to a stand mixer and beat it until it's creamy using the paddle attachment. This will take 3-5 minutes or longer if you're using a handheld electric whisk.
- Add the icing sugar a tablespoon at a time (so that you don't end up enveloped in a cloud of icing sugar!) Beat for a few minutes until the icing sugar is completely incorporated.
- Add a teaspoon of vanilla extract and 200g of Nutella to the buttercream and beat until fully combined.
- If your buttercream is too thick add a tablespoon of milk or double cream if it's too thin add icing sugar a tablespoon at a time until it reaches the desired consistency.
- Once your cakes have cooled you can turn them out from the tins and you're ready to assemble the Kinder Cake.
- Begin by adding the first layer of chocolate sponge to a turntable or cake board. Spread with Nutella buttercream and repeat until the cake is fully assembled.
- Use a piping bag (without a nozzle) or a palette knife to spread Nutella buttercream around the outside edges and top of your cake. I use a large cake spreader to get a smooth finish.
- Put the whole cake into the fridge to set the buttercream icing.
To make the White Chocolate Gold Drip
- Melt the white chocolate in a bain marie (saucepan set over a pan of boiling water). If using Dr Oetker chocolate you can safely melt the chocolate in short bursts in the microwave.
- Mix in 1-2 teaspoons of vegetable oil to achieve a pourable consistency.
- Transfer the white chocolate to a squeezy bottle (if using) and do a few practice drips down the side of a bowl. You can also use a teaspoon to drip the chocolate directly. As the chocolate cools you will be able to see how fast the drip is flowing. You may need to leave it a few minutes if it looks to runny on your practice drips.
- When your practice drips look good, you can move on to adding the drips to your cake. Use the squeezy bottle or teaspoon to add drips around the outside edge of the cake. When you've finished put the cake back in the fridge until the white chocolate doesn't feel tacky to the touch.
- Once it’s dry, use a small food-safe paintbrush and paint the gold colouring directly on top of the white chocolate.
To Decorate
- Fit a piping bag with a nozzle (I use Wilton 1M) and fill it with remaining buttercream. Pipe swirls around the top of the cake.
- Add Kinder Chocolate decorations around the bottom and on top of the cake and your masterpiece is complete!
Nutrition Information:
Yield: 14 Serving Size: 1 gramsAmount Per Serving: Calories: 797Total Fat: 40gSaturated Fat: 26gUnsaturated Fat: 0gCholesterol: 109mgSodium: 264mgCarbohydrates: 103gFiber: 3gSugar: 77gProtein: 7g


Donna
Oh my gosh Amy, this looks amazing! x
Sally
This looks AMAZING! I could never get the finish to look as polished as you have but I'd sure have fun trying.
Amy Treasure
Oh thank you Sally! I am sure you could do this, it's really not as tricky as it looks ;-)
Geraldine Grant
Hi Amy, I'm going to be very adventurous and try this for my sons birthday. If I manage to make it, could I do it the evening before his party and store it in the fridge,? Xxx
Amy Treasure
Hi Geraldine, I promise it's easier than it looks! If the weather is chilly like it is at the moment you will be absolutely fine to leave it out of the fridge overnight, just clingfilm it really well and leave it somewhere cool and dark. If it's really warm on the day you bake then you can put it in the fridge but again wrap it really, really well otherwise the sponge will dry out. Alternatively, you could make all the cakes then clingfilm them and put them in the freezer and decorate on the day - frozen cakes are much easier to ice! Add the chocolate bits and bobs on top just before you serve. Good luck! Let me know how it goes? xxx
Dan
What size cake tin did you use?
Amy Treasure
Hi, I use the Wham Layer Bake Tins ( a set of 5) On Amazon here: https://amzn.to/2mqKh1I (affiliate link) Or you can bake in 2 8 inch tins and then cut into 4 layers if you wish. Hope that helps.
Vicky
Hi Amy,
I think the explanation of how to make the white chocolate gold drip is missing, unless Im going mad. Could you give me the instructions for that please?
Thanks in advance,
Vicky
Amy Treasure
Hi ya Vicky, the info you need has disappeared from the recipe card for some reason. No idea why! Full instructions are underneath the heading 'How to make a gold drip'. I'll fix the card now. Thanks so much for letting me know. Enjoy the cake! Amy
mohan kumar
This look so fresh and delicious.Thank you so much for the recipe!
Amy Treasure
Thank you so much, Mohan!
sam betteridge
Recipe pretty simple to follow and the end result is great! Thanks!
Amy Treasure
That's great to hear!
Chelsea wilson
Hey, I’m about to try this recipe for my friends 30th birthday next weekend. Can I ask please what size cake board and
Case I would need please?
Many thanks
Chelsea
Amy Treasure
Hi Chelsea, I would go for a 9 or 10-inch cake board. I haven't boxed it but I would personally go for a box the same size as the board you choose, so that it doesn't move around too much. Please let me know how the cake goes!
Marie
Hi,
What diameter do I need to ring to make the cake?
Amy Treasure
This cake can be baked in two 20cm (8-inch tins) OR split into 4 or 5 layer cake tins to make a tall layer cake. My personal preference is to make 5 layers and pile on the Nutella buttercream in-between.
Gracie Gilleece
I’m confused on the size of my 2 8inch baking tins as they look really small online when I went to order them but I don’t really want to use more than 2 baking tins ?
Amy Treasure
Providing your 8" tins are deep enough they will be fine, you'll just end up with a shorter cake. You could also bake in the two 8" tins and then cut the baked cakes in half so you end up with 4 layers.
Desicart
so yummy!! i love it! i ll definitely try it!!
Sarah
Hi - I just wondered how long the cake would keep once made? Thank you
Amy Treasure
Hi Sarah, if you slice it, wrap it in cling film and put it in the fridge it will last for at least a week. Enjoy! Amy
Maria
Hello! First of all, thank you for the recipe and for the effort to describe everything in details. I have tried this recipe, but I wasn't very happy with the result. The chocolate bases were very dry :( together with the frosting which became very solid in the fridge it was a very dense, dry and heavy cake. It was also a LOT of it! A huge cake. I think the chocolate bases could benefit from some moisturizer, like fruit juice or tea.
This is just my opinion; however, I really appreciate the recipe, as I wanted to bake Kinder Bueno cake for my fiancee's birthday (he is a huge fan of Kinder Bueno) and he loved it! :)
Amy Treasure
Hello! This is one of my most popular recipes - hundreds of people view this page every single day and I've had lots of amazing pictures and feedback sent to me. Not one person has ever said the cake is dry so it does make me wonder if you didn't completely follow the recipe and method. Regarding the buttercream frosting becoming solid in the fridge, well, it is made from butter. If you left butter out the fridge then put it back in it would harden again. Same thing happens with all cakes that have buttercream frosting. They will obviously harden in the fridge, you just need to bring to room temp before you eat it. And yes it is a huge cake - the fact it is 5 layers and feeds 14 people was a bit of a giveaway. Glad your fiance loved it! Amy
Anna
I want to try this for my husbands bday ( I’m a total beginner) but I’m currently having slight issues with my oven ( in between moving) can I bake this on the stove top? I tried a few basic chocolate cakes on the stove and they turned out fine, would this be okay? Also can you use full fat milk instead of skimmed milk or fresh cream?
Thanks!
Amy Treasure
Hi Anna, I haven't tried making this cake on a stovetop so I wouldn't like to recommend making it that way. Maybe try a chocolate cake recipe you know works on the stove then team it with the buttercream and decorations featured here? You can use full-fat milk in chocolate cake and full-fat milk or cream in the buttercream. Hope the birthday cake turns out well! Thanks, Amy
Amy Treasure
Hi Joe, thank you for the feedback. I'm sorry to read this recipe didn't work out as expected for you. The tins linked are the tins I use every time I make layer cakes and are the same as the ones in the video and images you see in the post. The layers are quite thin and small so I don't know why yours fell apart. I haven't had anyone else reporting this problem so maybe that comes down to the difference in tins. Perhaps they've changed since I bought them a couple of years ago? I'm so glad the cake part tasted good but it shouldn't be crumbly. Very rich and moist - yes but crumbly - no. It could have been overbaked or your oven running too hot. You need to whip the life out of buttercream to get it light and fluffy which could explain the darker colour. It's really hard to say what went wrong exactly without observing you make the cake. It's a shame you feel it's overcomplicated as many people have had amazing success with this recipe and it continues to be one of my most popular. When people don't get good results it makes me really sad! I hope you'll try something else from my site and again, I'm sorry you didn't get the desired outcome. Amy
Maria
Hello Amy,
I am going to make this cake for son's bday next weekend. I will make a 2 layers cake. Should I use half of the ingredients for the cake?
Thank you!!
Amy Treasure
Hi Maria, for a two-layer cake, I would use this chocolate cake recipe instead: https://www.amytreasure.com/chocolate-orange-cake/ Leave out the orange extract and zest and use the frosting recipe from the Kinder cake as it is in the recipe. Hope that helps! Amy
bharasamy
Thank you Amy, it came out here great! Made this for a birthday, I thought 6inch cake tins would be too small but with 5 layers it was the perfect amount. I probably should have spent a bit extra time slicing off the tops of the baked cake layers to make them perfectly flat as they did start to slide off a bit once stacked, but managed to balance them eventually. I also probably should have started mixing ingredients in bigger bowls as I found myself switching between three or four mixing bowls, but was not a massive issue. Overall very satisfied and you saved me a lot of money! Thank you!
Amy Treasure
Hi, I am so happy to hear you enjoyed this recipe. Thank you so much for the feedback, Amy
Tina Henderson
Hi Amy, I made this cake it come out perfect love the flavour and it stacked perfectly, love it so much will definitely be making this again and again .
Thank you x
Amy Treasure
Hi Tina, so pleased to read this. Thank you for letting me know you loved it x
Carla
Loved the cake- it was a big hit.
I have another birthday coming up soon and I was wanting to do a biscoff alternative!
Do you have a vanilla sponge recipe I could use as an alternative?
For the buttercream I was just going to sub out the nutella for biscoff spread obvs : D
Amy Treasure
Hi Carla, I am so pleased the Kinder cake went down well!
Yes I have another cake recipe that would be ideal for what you're planning (Biscoff cake sounds amazing!) If you use this one: https://www.amytreasure.com/victoria-sponge-cake/ you can add 2 teaspoons of vanilla extract to make it a vanilla cake. The buttercream will work amazingly with biscoff spread added. I hope the cake goes well! Amy
Tsi
Hi Amy
Made this for my friends 30th over the weekend and she absolutely loved it! She actually thought it was store bought hehe even tho My finished looked wasn’t the greatest! I am still learning how to stack the cakes mine were a little lumpy and how to get that polished finish any tips? Thank you for this yummy recipe excited to do it again and more of your recipes!
Amy Treasure
Hi Tsi! I'm so pleased to read this! For neatly stacking cakes the trick is to get them really evenly baked. So make sure to use a good cake release on your baking tins or line them with non-stick baking paper. Smooth the top of the cake mixture with a spoon or spatula and tap the tins on your work surface (to release any air bubbles) before the cake goes in the oven. If the finished cakes are a little uneven you can usually level them out with buttercream but it all comes with practice and it sounds like yours looked pretty amazing since your friend thought it was shop-bought! Well done. Hope you find some more recipes here that you love x
Claire
Going to make this for my niece's 16th birthday next week! Will it be OK to use 2x 20cm cake tins? Only want a 2 layer cake. She's going to love the Nutella icing no doubt!
Amy Treasure
Yes that would be absolutely fine, just don't overfill the tins. Hope your niece loves it!
Amy Treasure
Thank you so much for leaving a review. I am so pleased your niece loved her cake x
Ewelina
Hi, I made the cake today and only used 2.5 tsp of salt. It came out quite salty- are these the right measurements or is there a specific salt that I should have used?
Amy Treasure
Hello, the recipe is for .5 (1/2) tsp salt. I'm not sure why you used 2.5 tsps?
Natalie
Oh my gosh! I love baking but don't do it often and I'm not very adventurous. It looked amazing, tasted amazing (even days after baking) and brought so much joy!
I followed the recipe and instructions. I used two tins and sliced in half to create 4 layers. I only wish that I could send you a photo as I was so proud of myself and my daughter was amazed (it was her 13th birthday treat).
Thank you for sharing this, making a new teenager happy and bringing confidence to my baking ability
Amy Treasure
Thank you so much for the lovely comment. I'm so glad you enjoyed making it and hope your daughter had an amazing 13th birthday!! You can always send me pics on Instagram @amytreasureblog I'd love to see it! Amy x